Introduction
This article covers the steps required to create a Paylink in the Fortis Gateway.
Getting Started
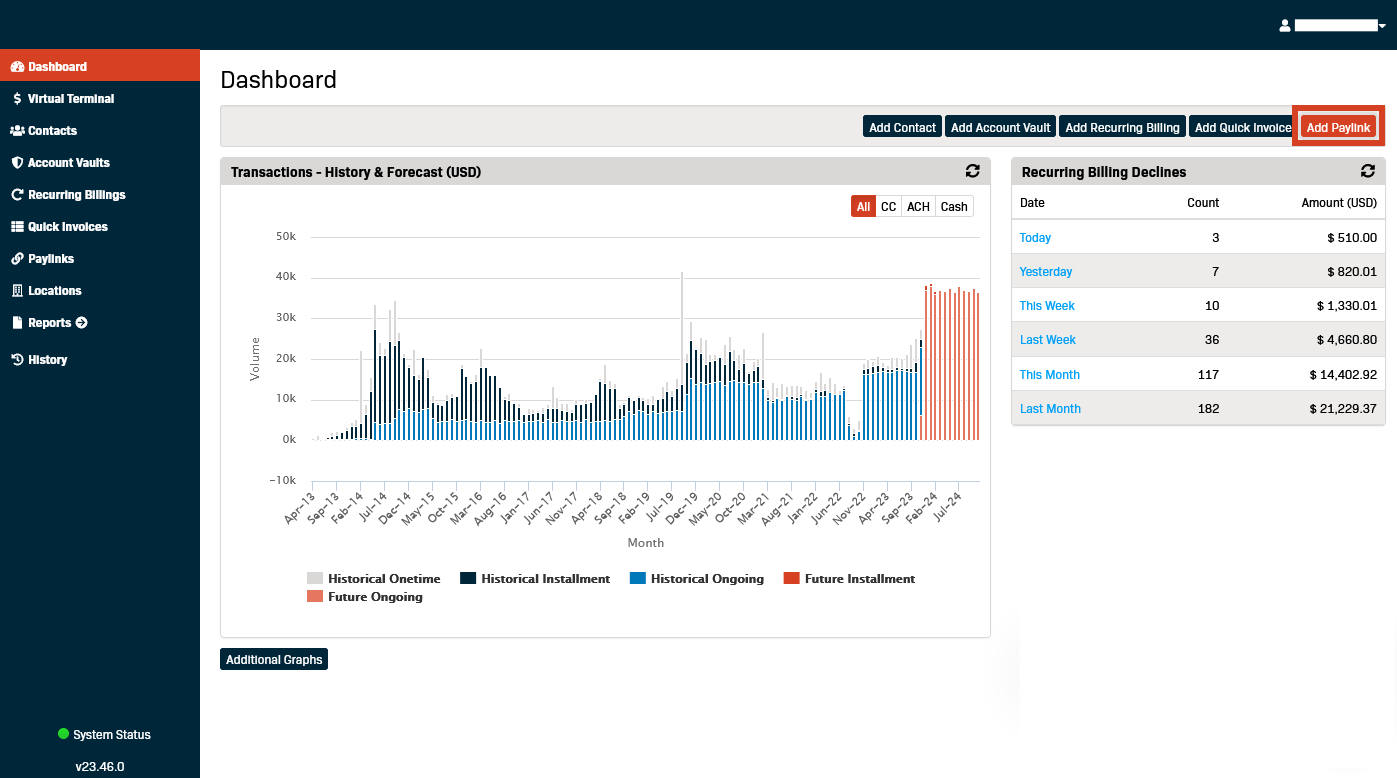
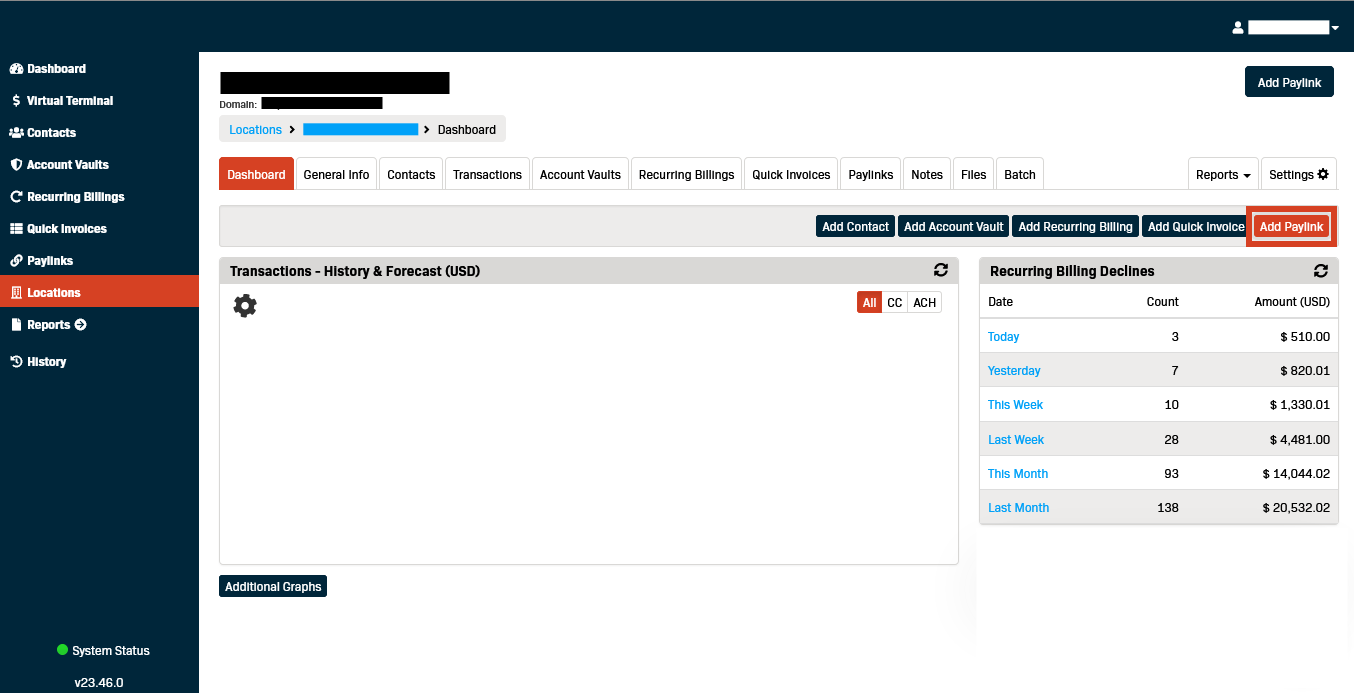
A Paylink can be created from the Dashboard or Location pages in the Gateway.
- The Add Paylink button is in the upper right corner of the Dashboard page.
- On the Locations page, the Add Paylink button is in the Dashboard tab menu bar.
Create the Paylink
- Click the Add Paylink button to open the Paylink form.

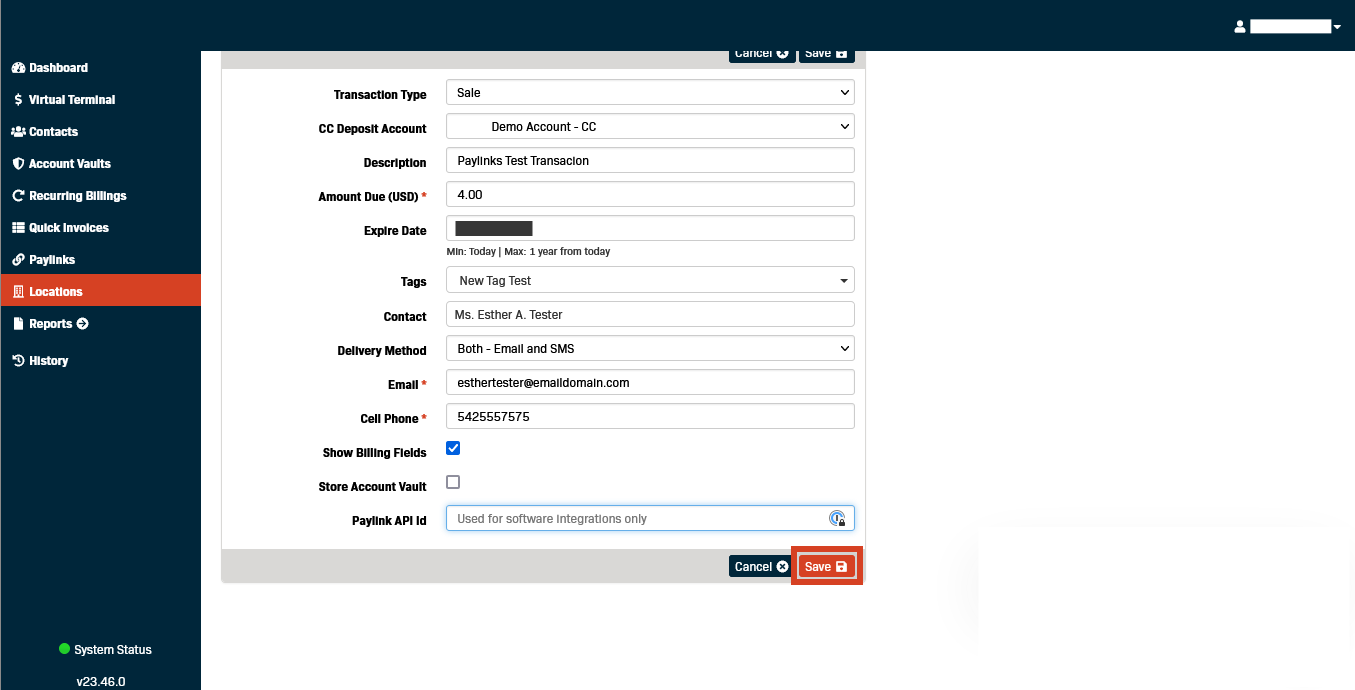
- Select the desired Transaction Type.
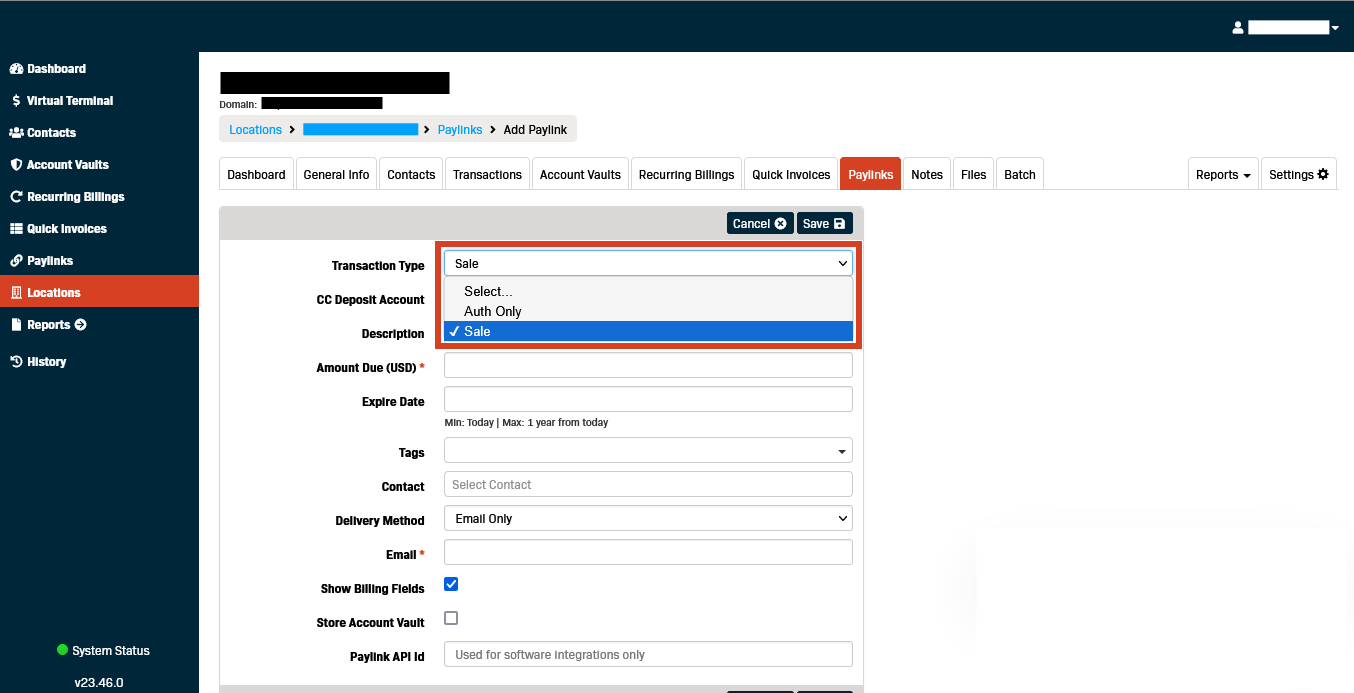
- Select the desired CC Deposit Account.
Note: The CC Deposit Account is the account to which the customer's payment will be posted.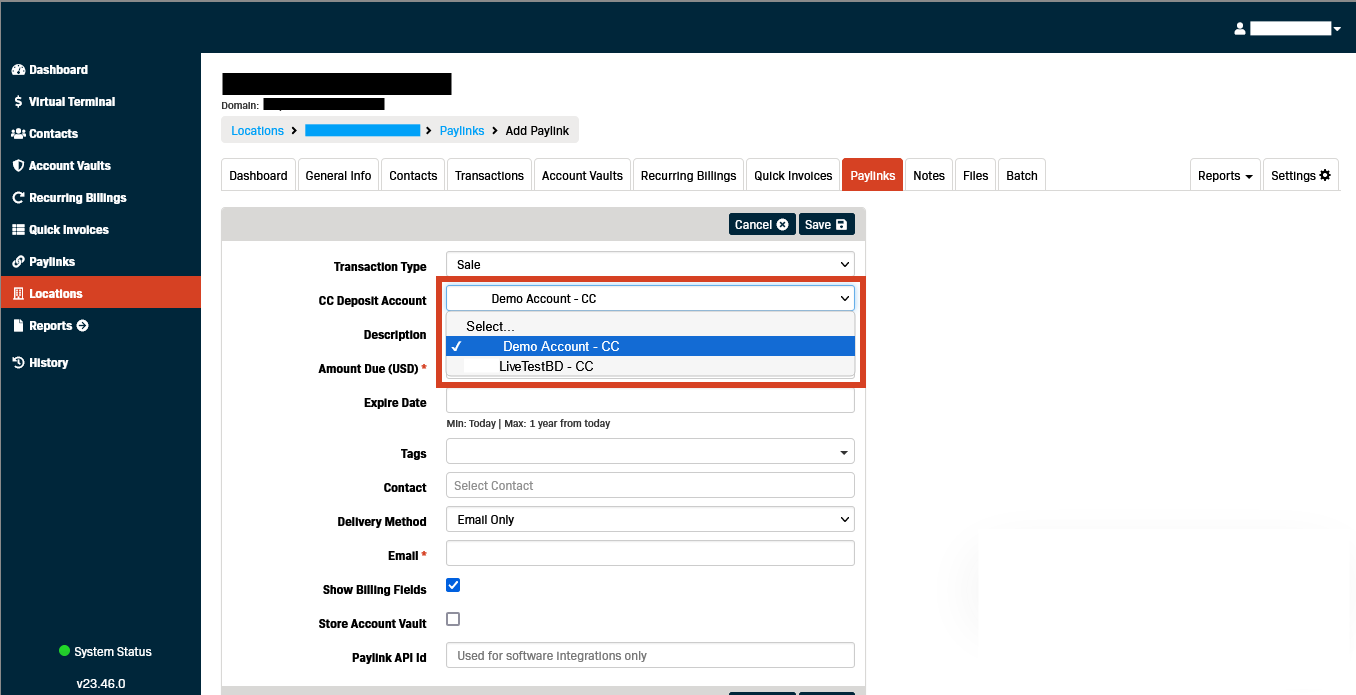
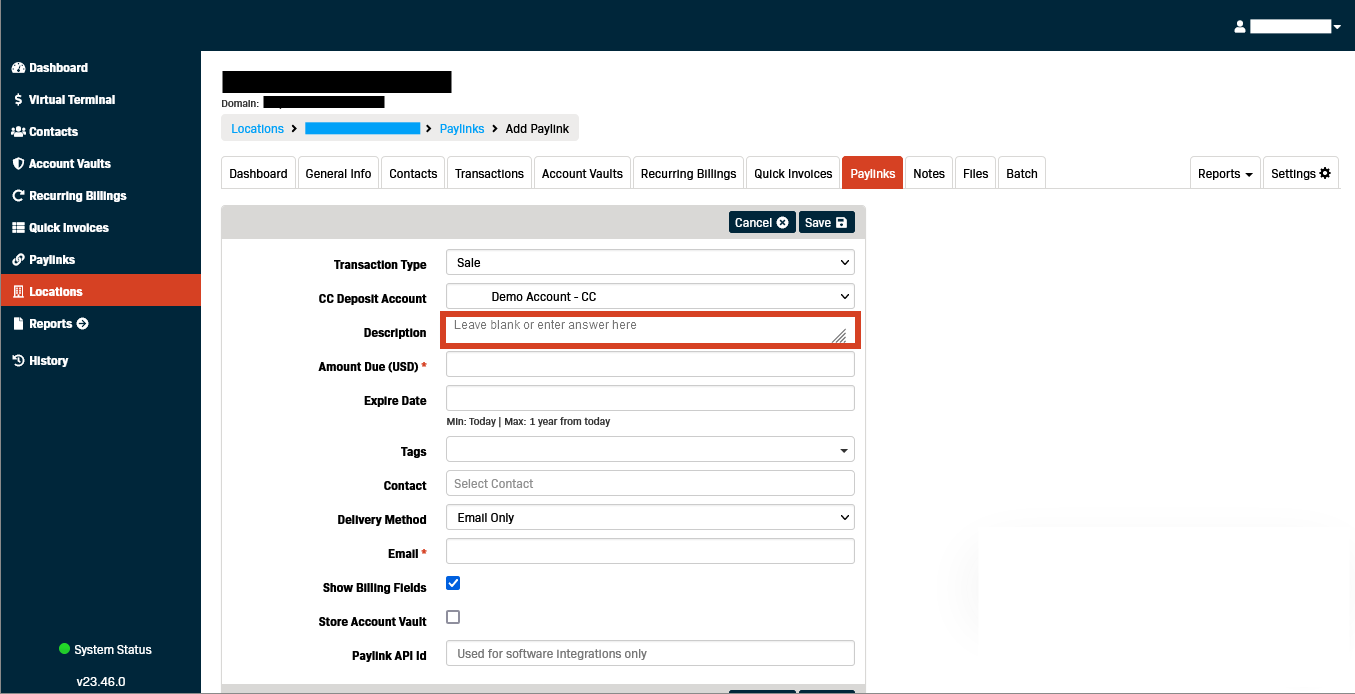
- Enter a Description for the transaction (if desired).
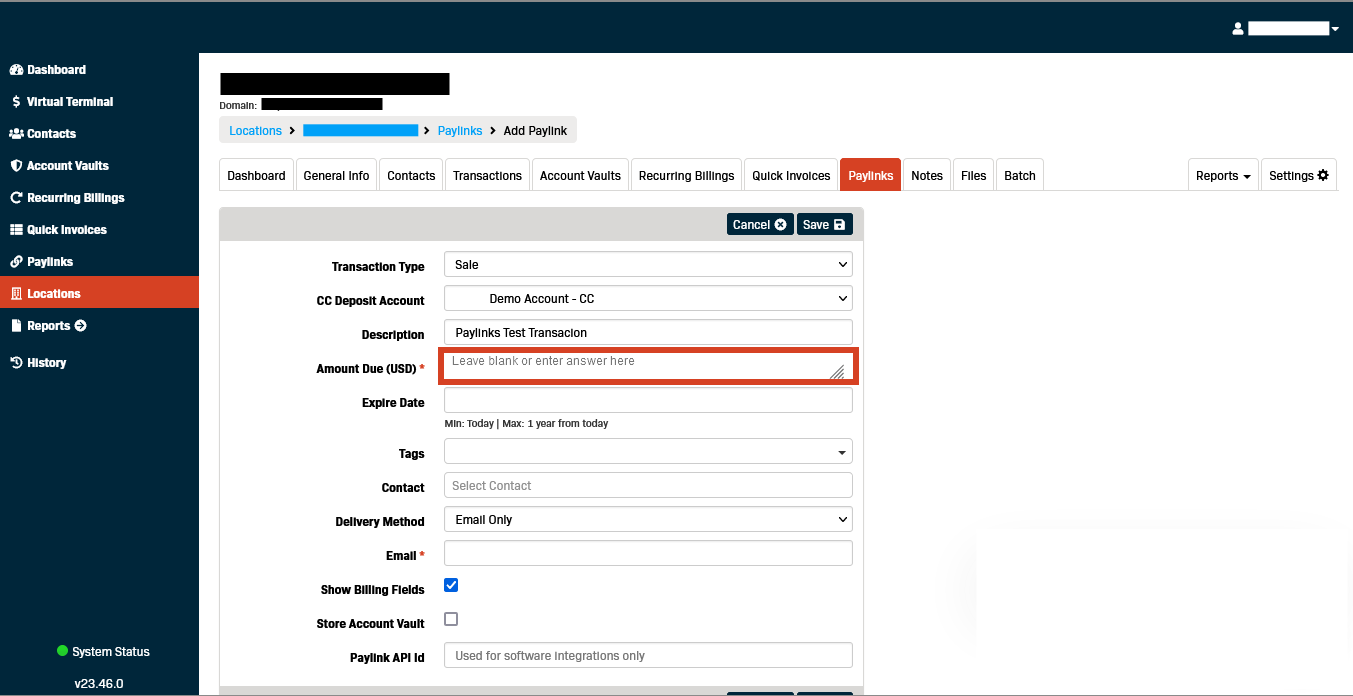
- Enter the total Amount Due.
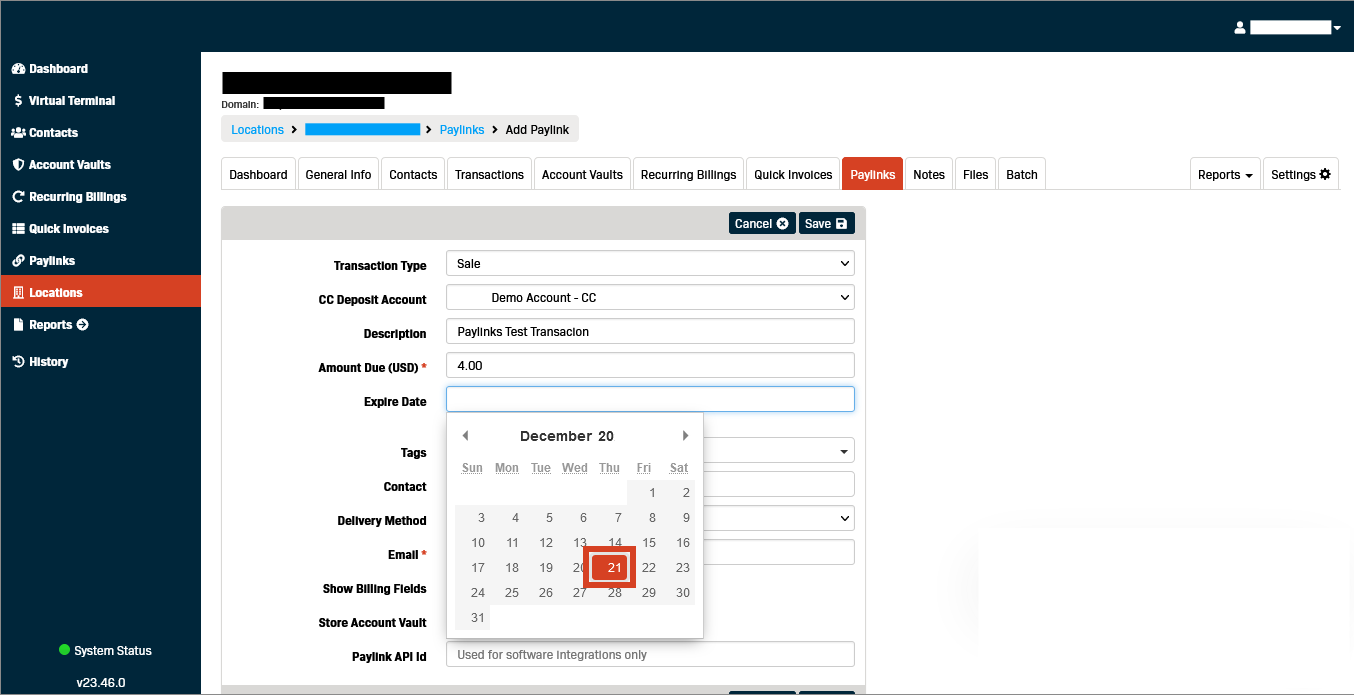
- Click in the Expire Date field to open the date picker and select an expiration date for the Paylink (if desired).
- If you use Tags, select them from the drop-down.
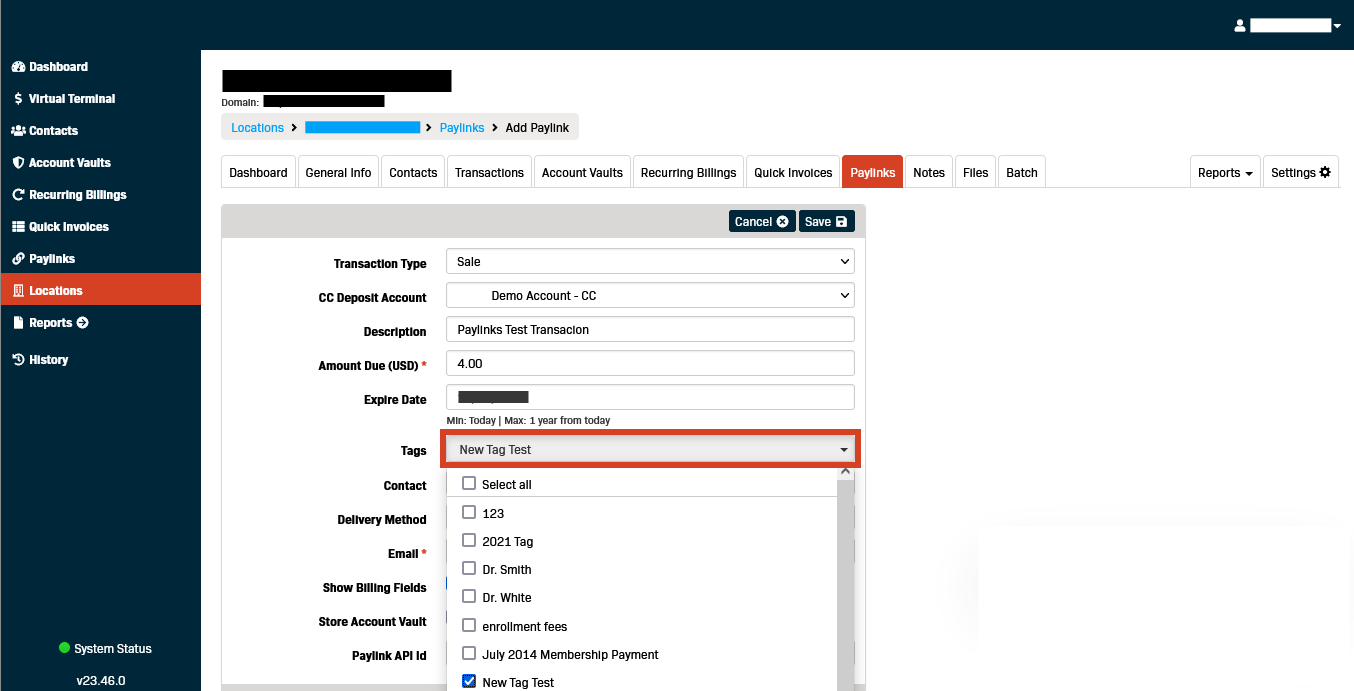
- Start typing the customer contact's name in the Select Contact field.
Note: If the contact has a saved Account Vault record, you can select them from the drop-down. If they do not have a
saved Account Vault, the name you enter will appear in the customer's Paylink view.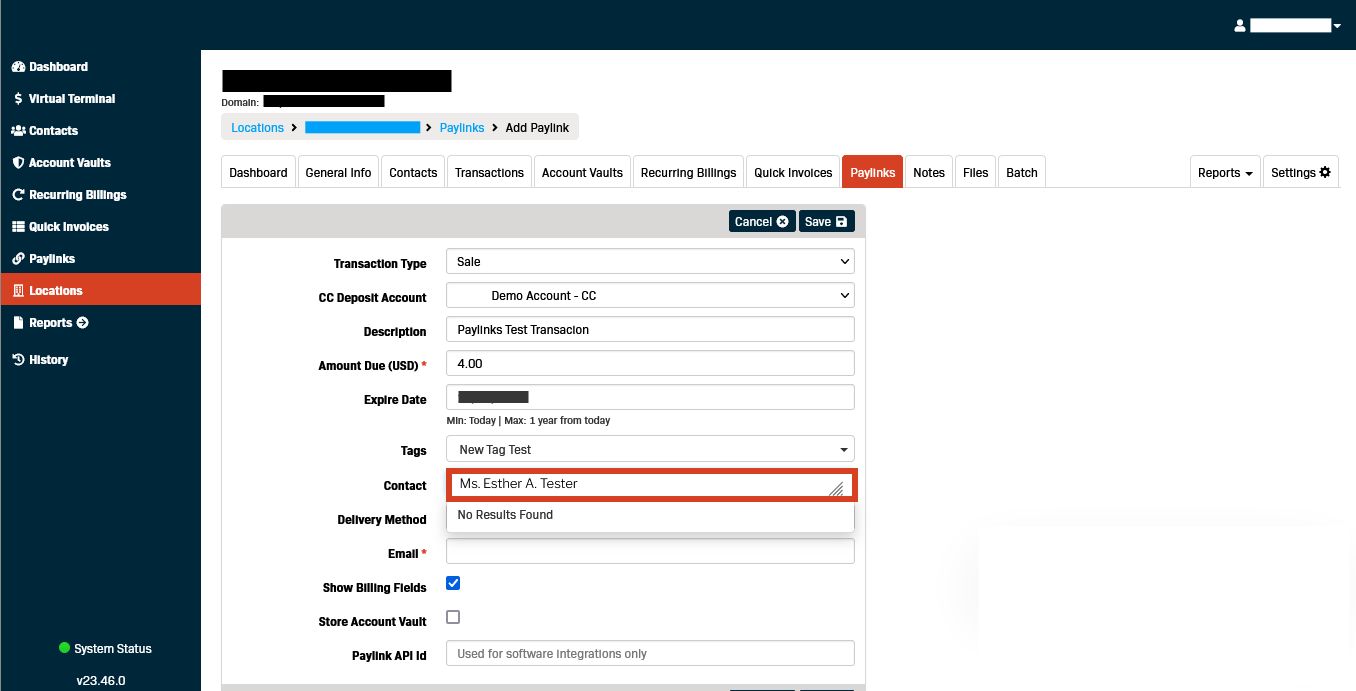
- Select the desired Delivery Method.
Note: If you select an SMS delivery method, the Cell Phone field will appear as required.
If you select an email delivery method, the Email field will appear as required.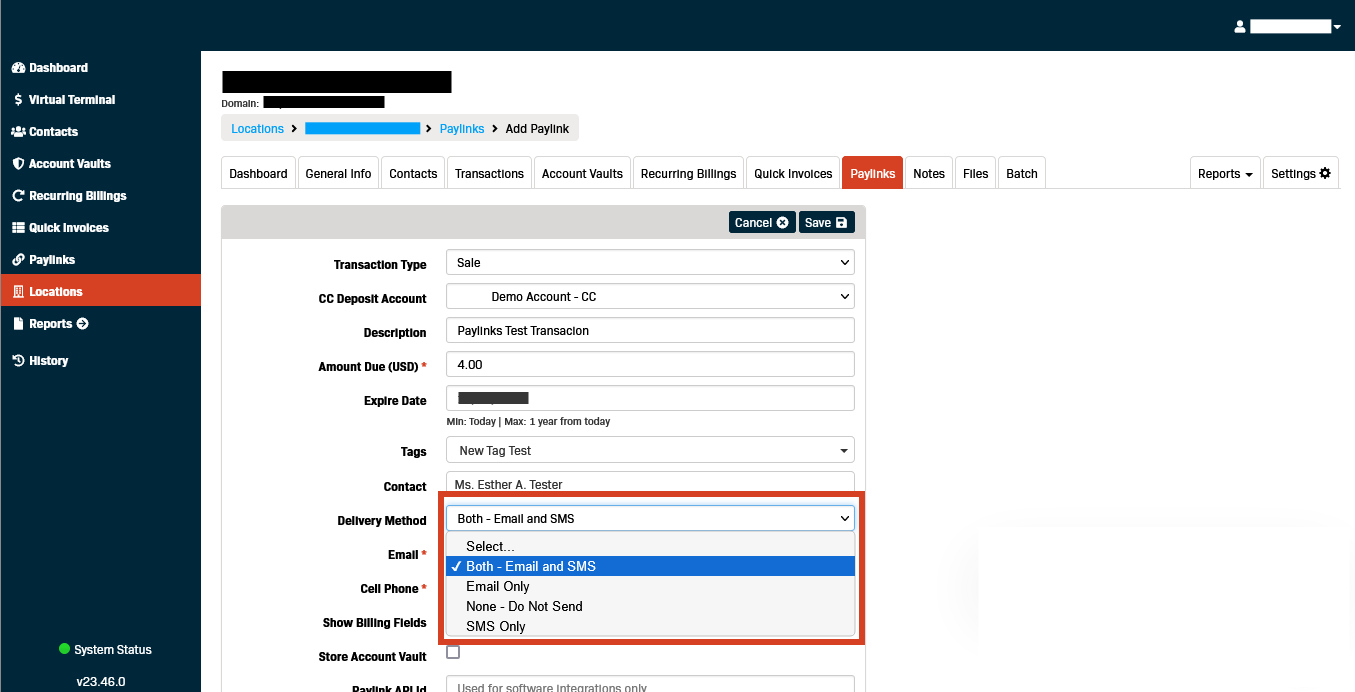
- Enter the recipient's Email address (if required).
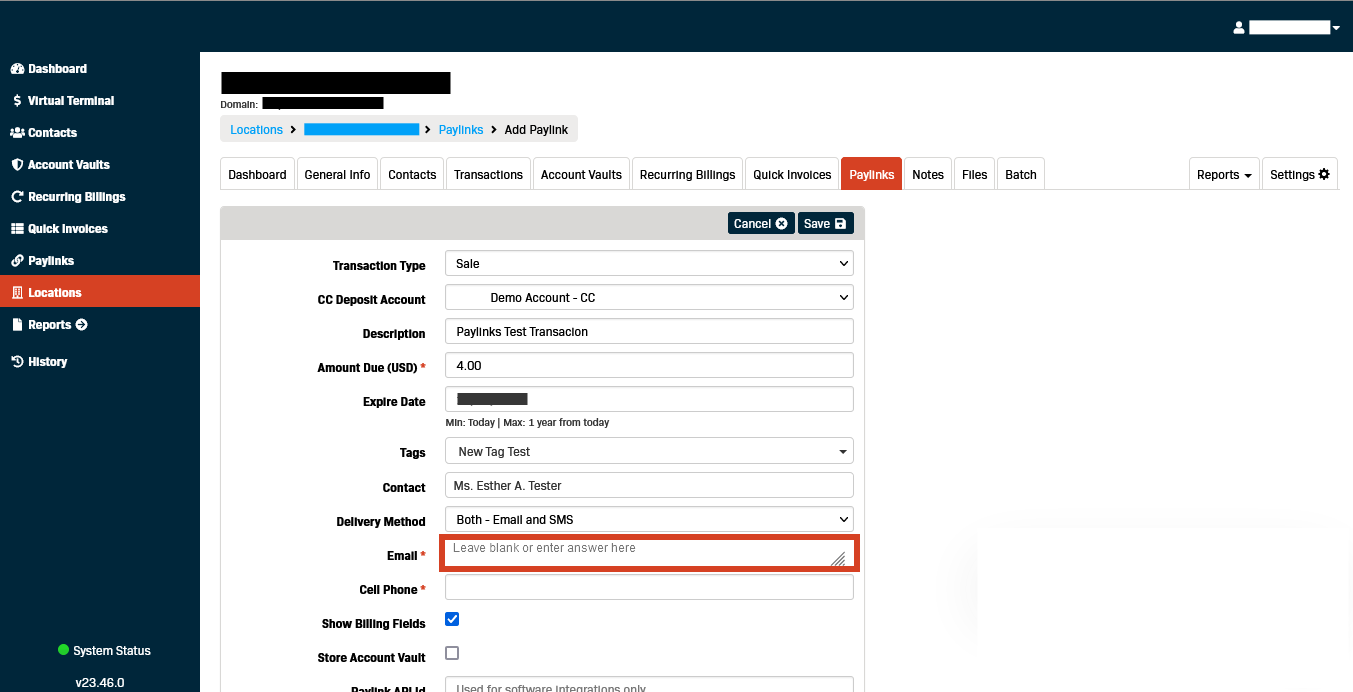
- Enter the recipient's Cell Phone number (if required).
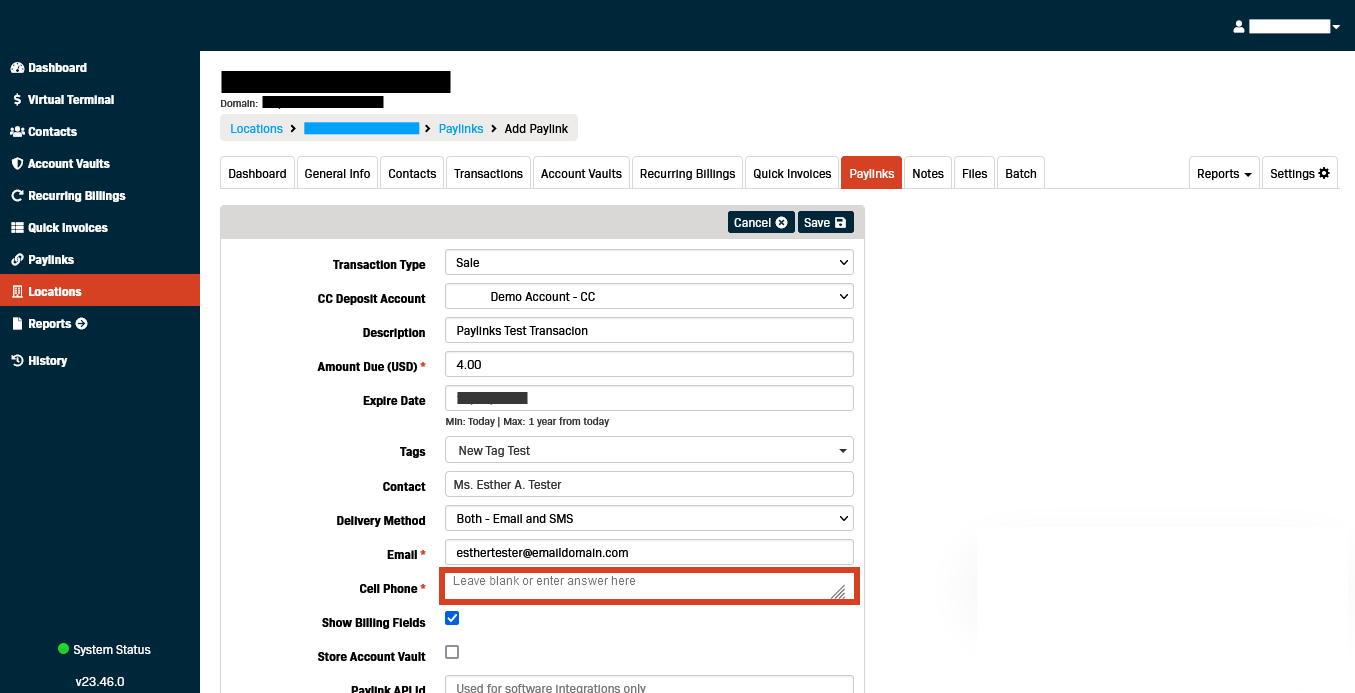
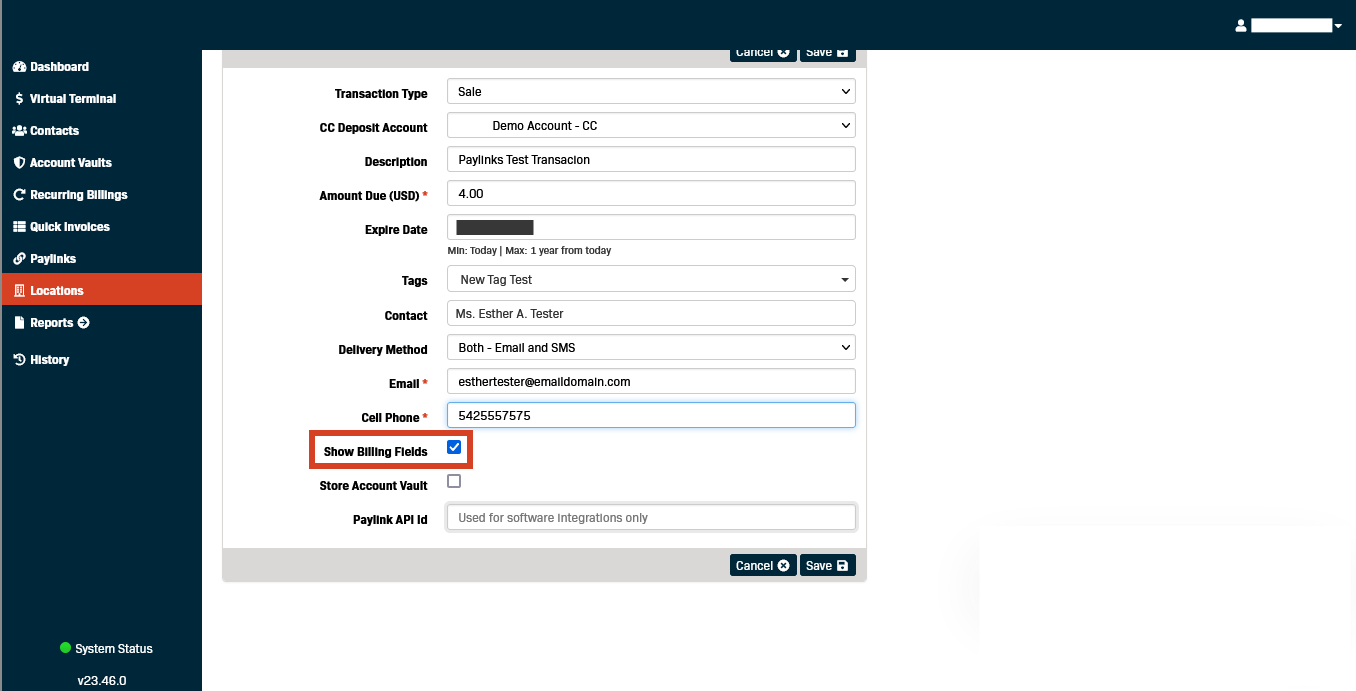
- Confirm that you want the transaction's billing fields displayed in the customer's Paylink view.
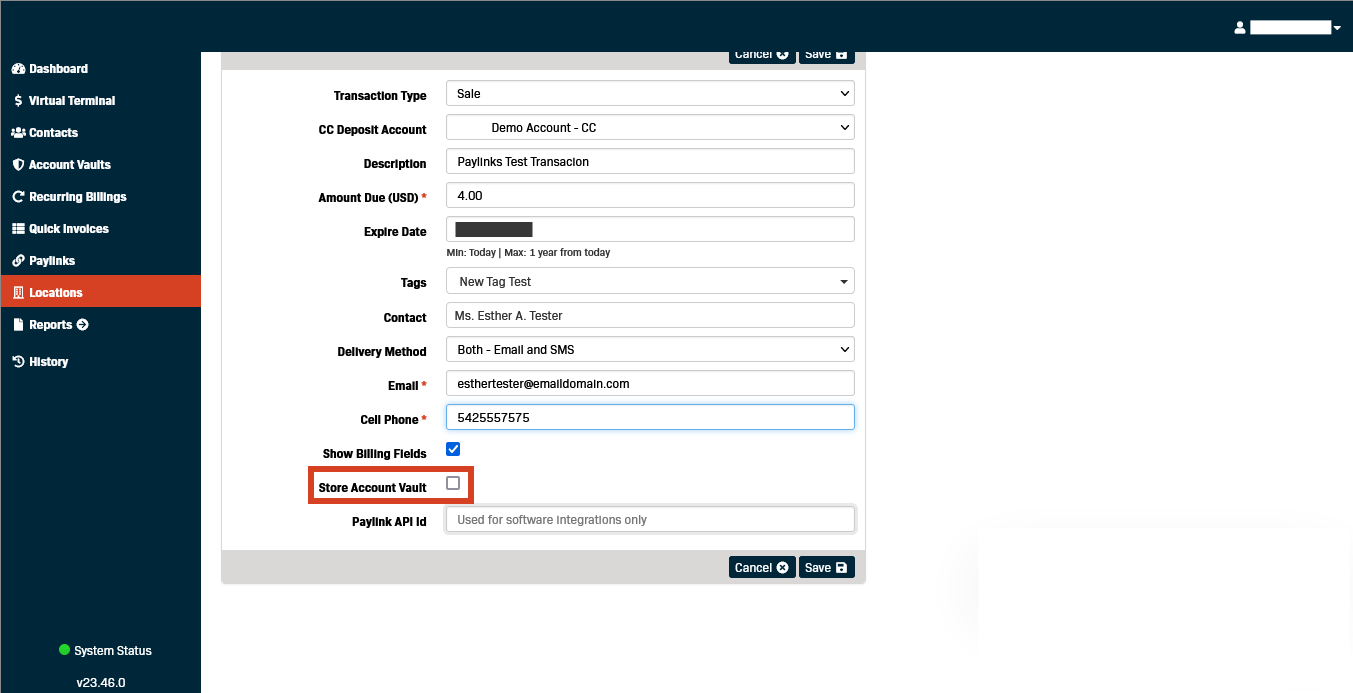
- Check the New Account Vault box to save the customer's information as a new Account Vault record which can be used for future transactions.
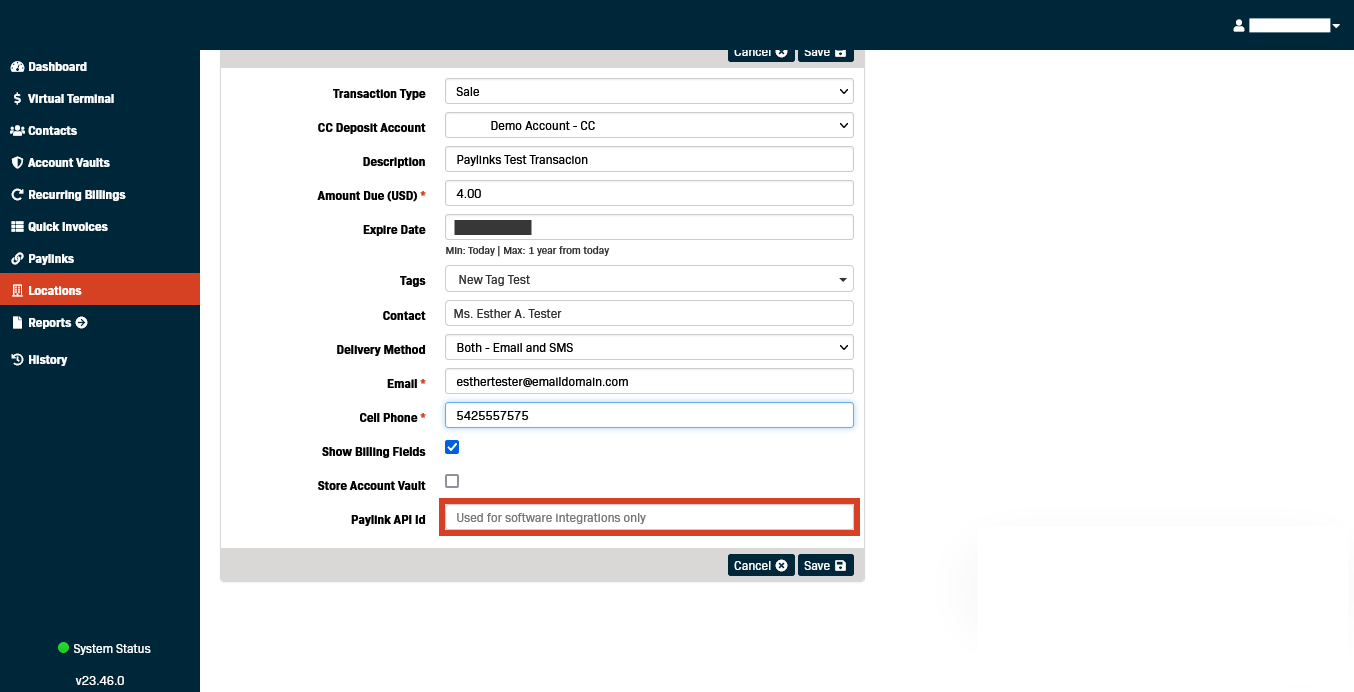
- If you have an integration that requires a Paylink API Id, enter it now before saving.
- Click Save to create the Paylink.
- A message box will appear at the top of the screen confirming that your new Paylink was saved successfully, and the new Paylink will appear in the list
at the bottom.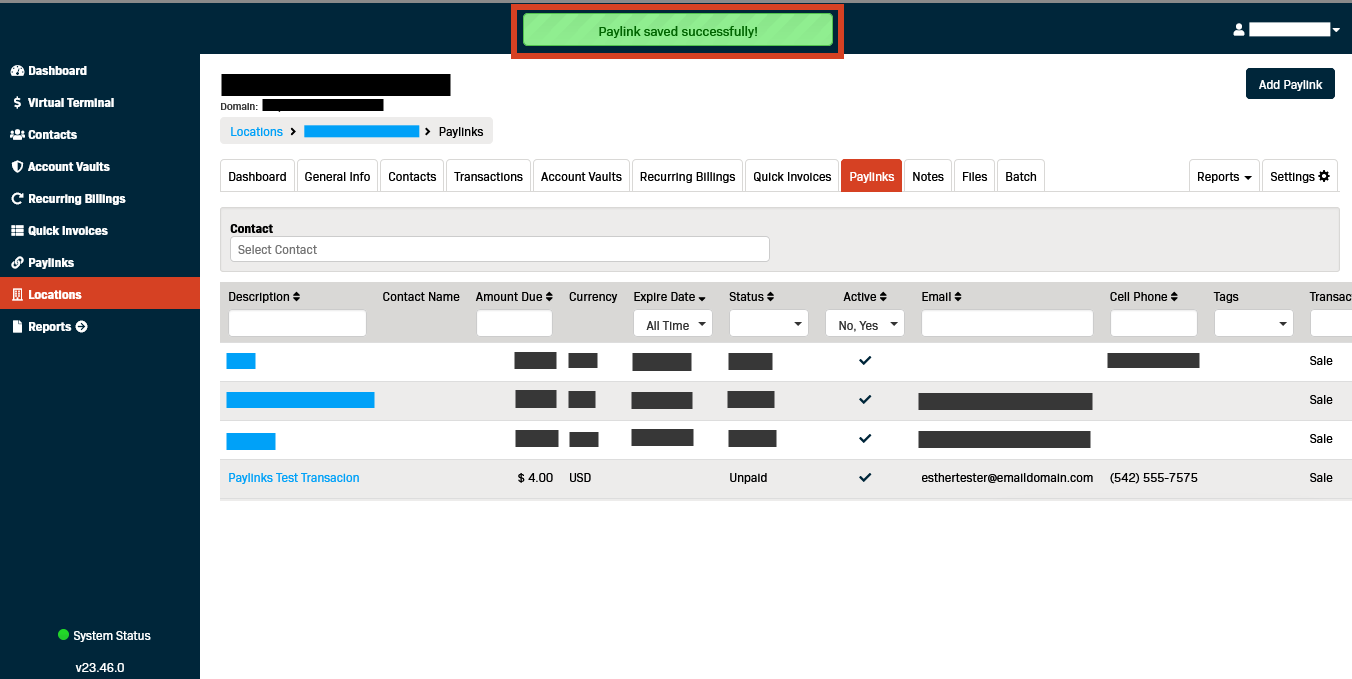
View an Existing Paylink
From the detailed view, you can take additional actions or view additional information related to an existing Paylink. The following steps outline the process
to navigate to this view.
image20
- Open the Paylinks tab on the Locations page.
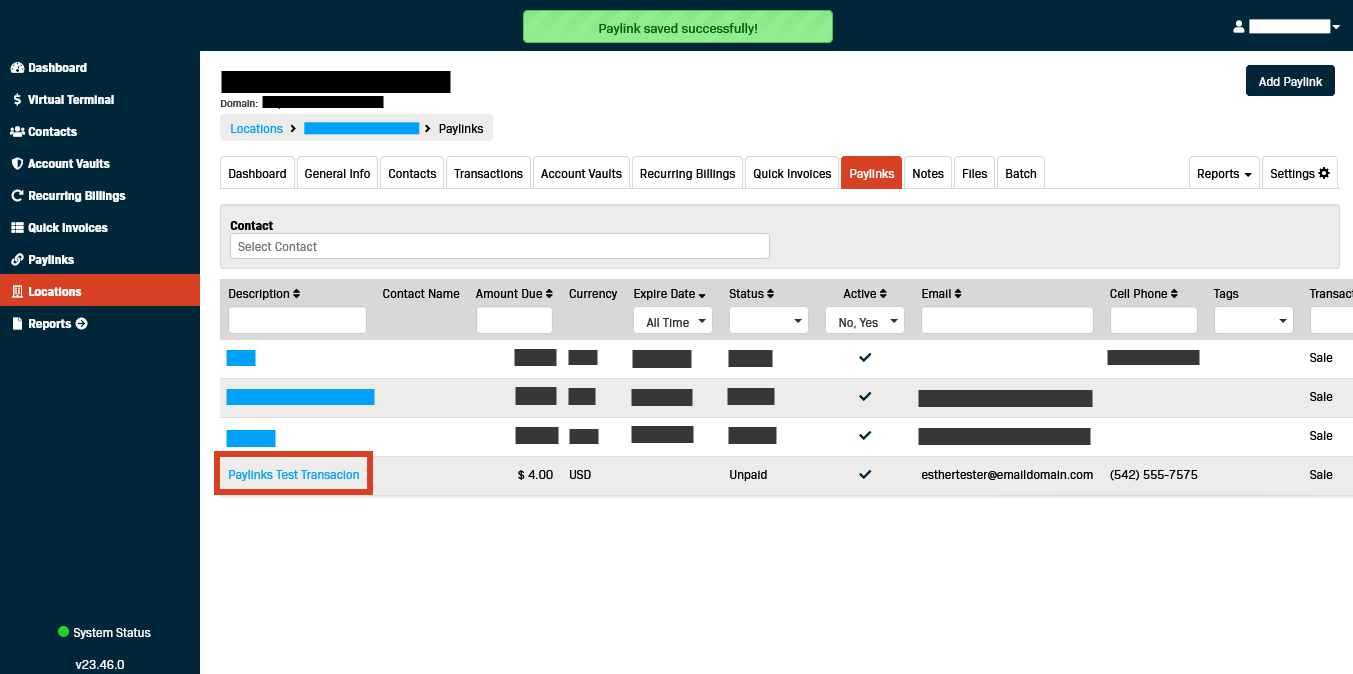
- Locate the Paylink you want to view.
Note: If you have a lot of Paylinks, you can use the filter fields just under the column headings to narrow your search. - Click the Description for the Paylink you want to open.

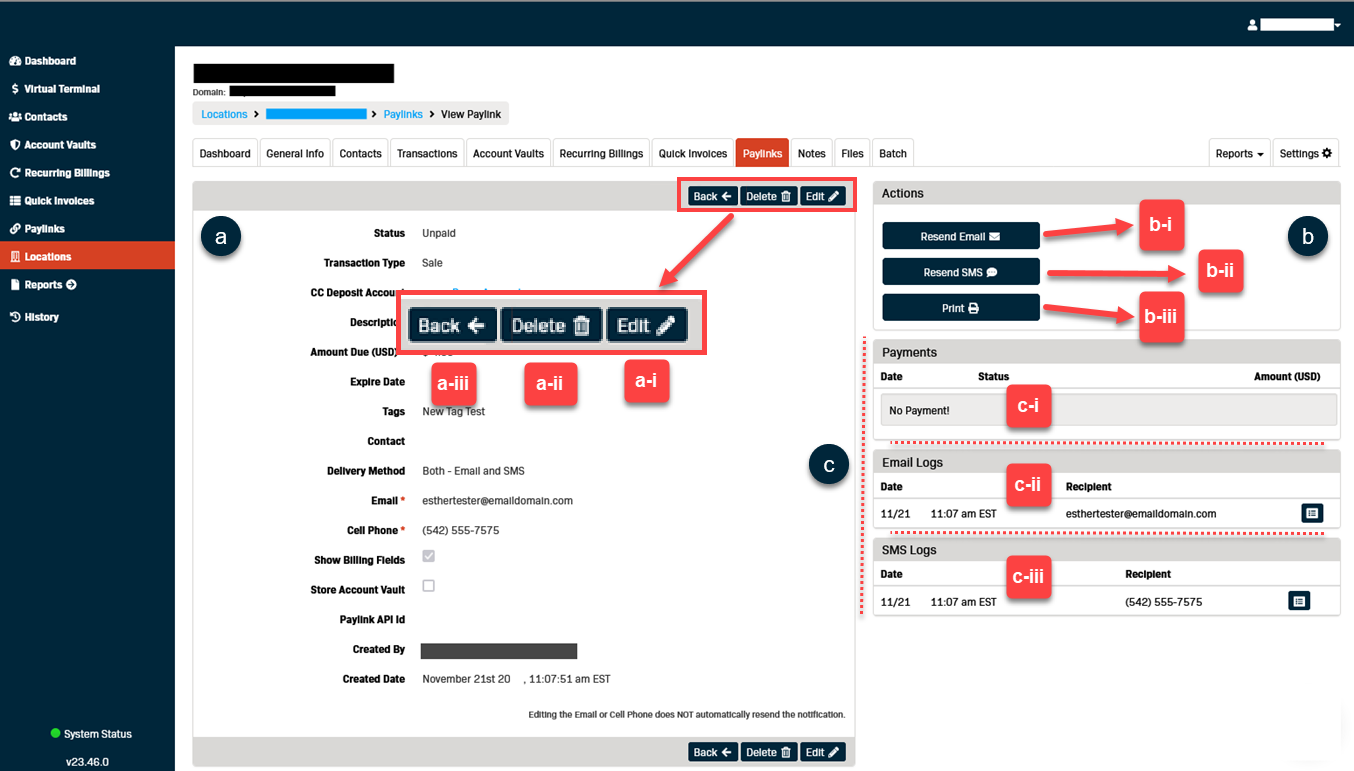
- Once you are in the detailed view, you will see several options and information tables arranged in a dashboard.
- The left panel shows the details of the Paylink transaction and has the following command buttons:
- Edit - This command opens the Paylink for editing.
- Delete - This command completely removes the Paylink transaction from the Gateway.
- Back - This command closes the detailed view and returns to the Paylinks overview screen.
- The top-right Actions panel contains the following command buttons:
- Resend Email - This command resends the Paylink as an email using the settings added when the Paylink was created.
Note: If you need to change or correct the email address, use the Edit command to update the address before resending. - Resend SMS - This command resends the Paylink as a text message to the Cell Phone added when the Paylink was created.
Note: If you need to change or correct the Cell Phone number, use the Edit command to update the number before resending. - Print - This command creates a PDF copy of the Paylink transaction that can be printed in hard copy.
- Resend Email - This command resends the Paylink as an email using the settings added when the Paylink was created.
- The remaining lower-right panels show log information related to the Paylink.
- Payments - This view shows the details for payments made through the selected Paylink.
- Email Logs - This view shows the details for all instances where the Paylink was sent by email.
- SMS Logs - This view shows the details for all instances where the Paylink was sent via SMS (i.e., text message).
- The left panel shows the details of the Paylink transaction and has the following command buttons:
