
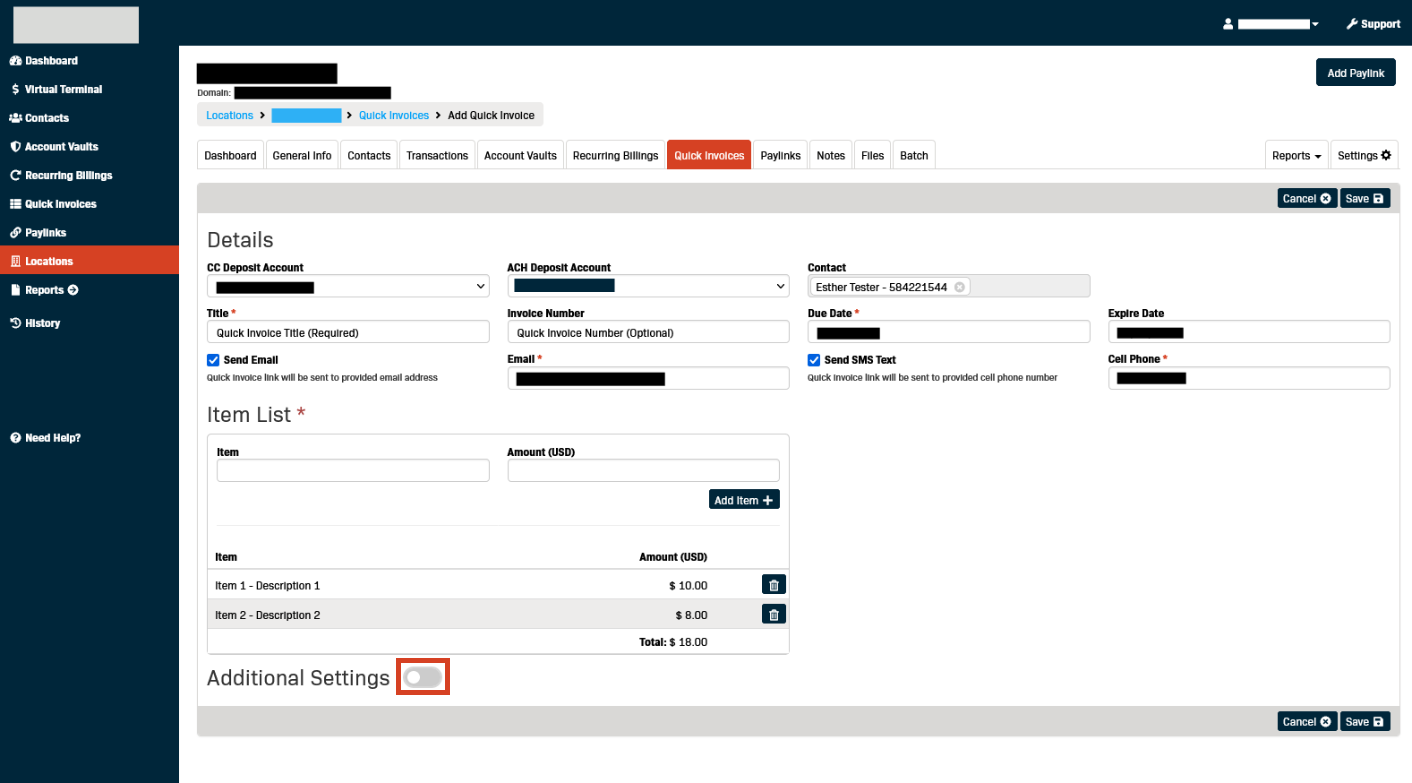
Getting Started
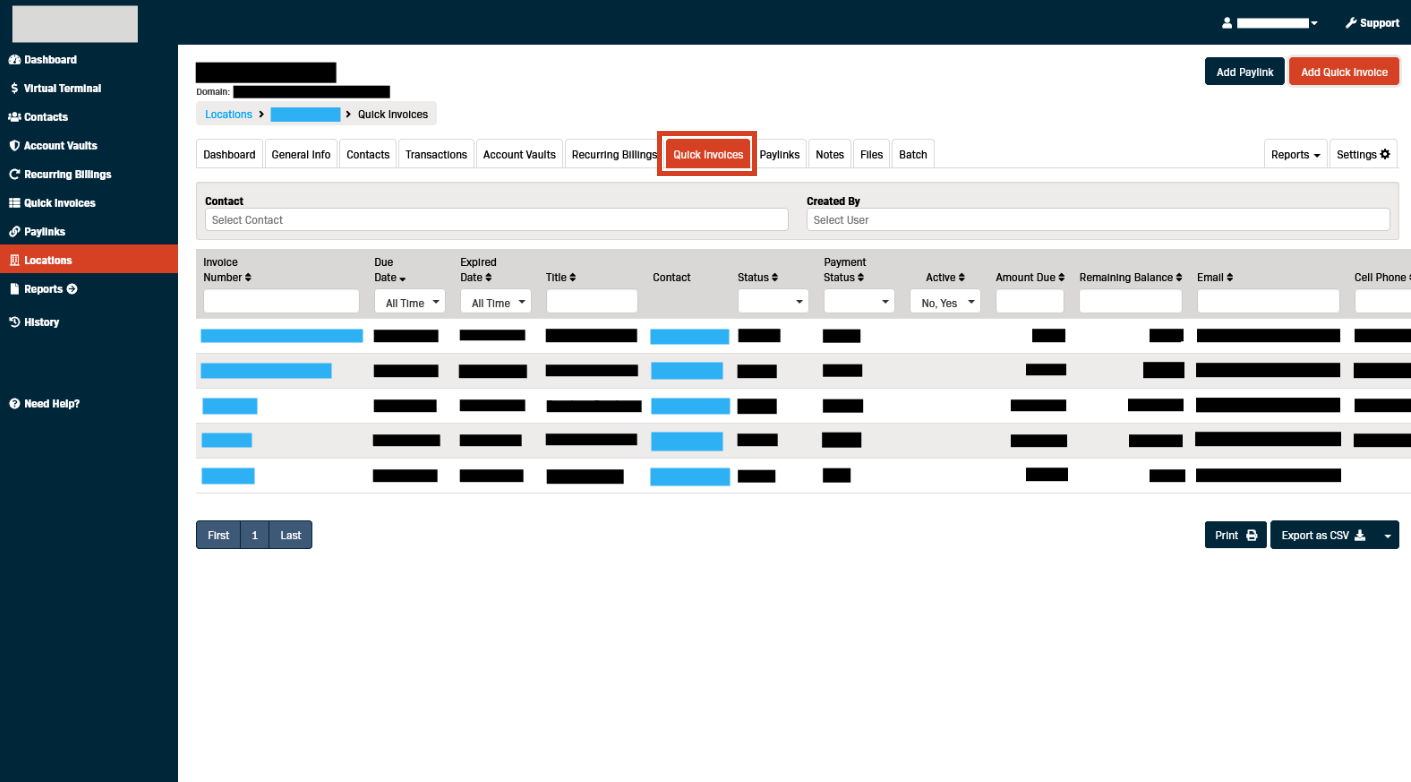
- Click the Locations option in the left-hand menu.
- Click the Location Name where you want to create a Quick Invoice.

- Click the Quick Invoice tab.
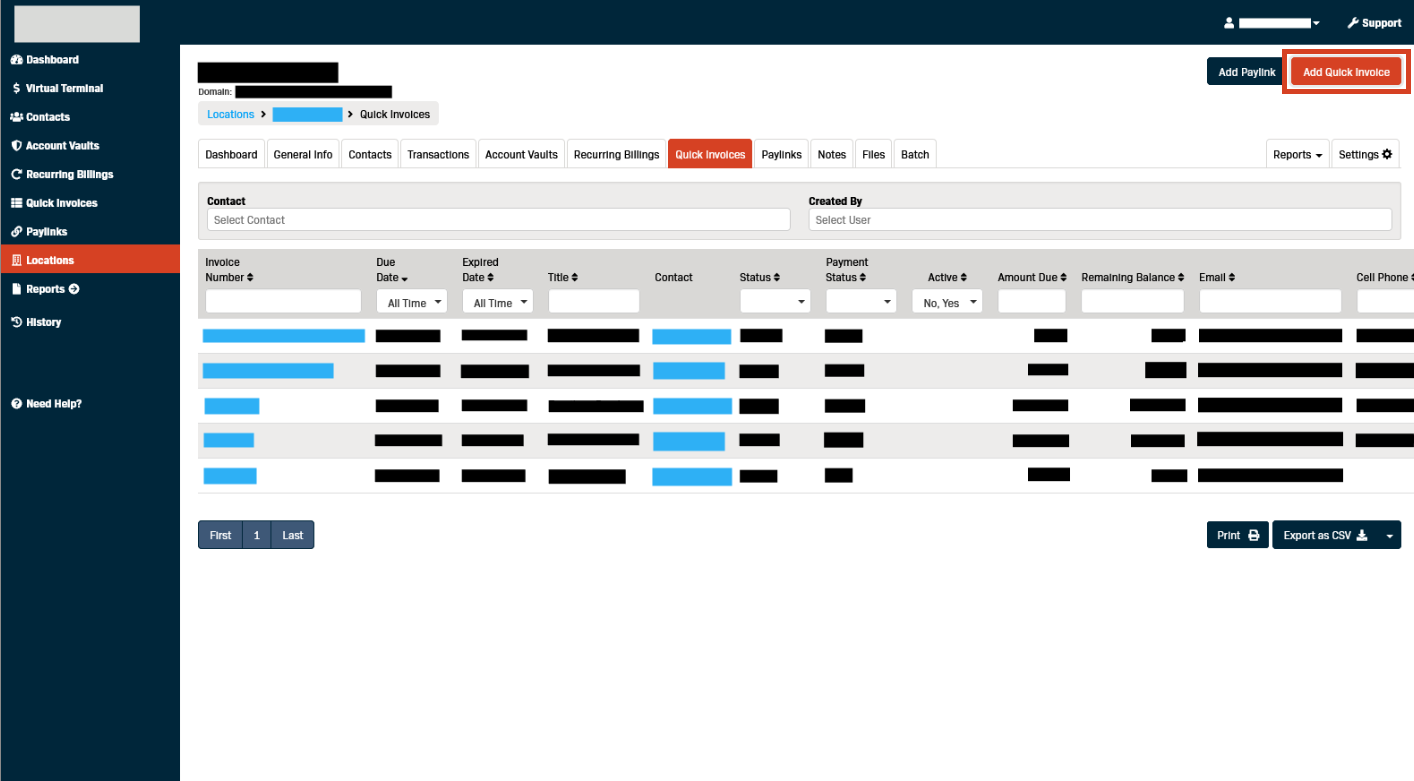
- Click Add Quick Invoice.
- If the Location has multiple CC Deposit Accounts created use the drop-down to select the one to use.
(Note) CC Deposit Account: If the payment is made with a credit or debit card, this is the deposit account under which it will be made.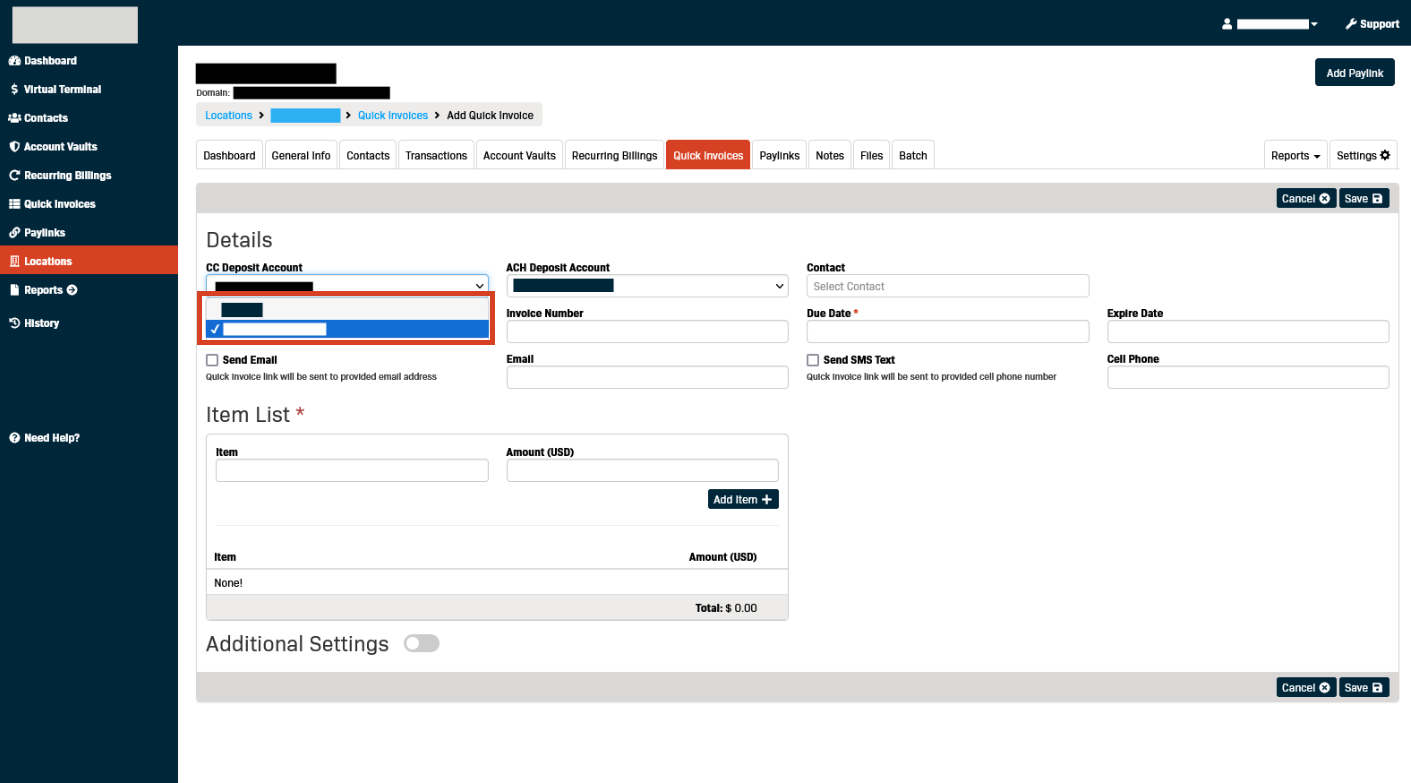
- If the Location has multiple ACH Deposit Accounts created use the drop-down to select the one to use.
(Note) ACH Deposit Account: If the payment is made via ACH, this is the deposit account under which it will be made.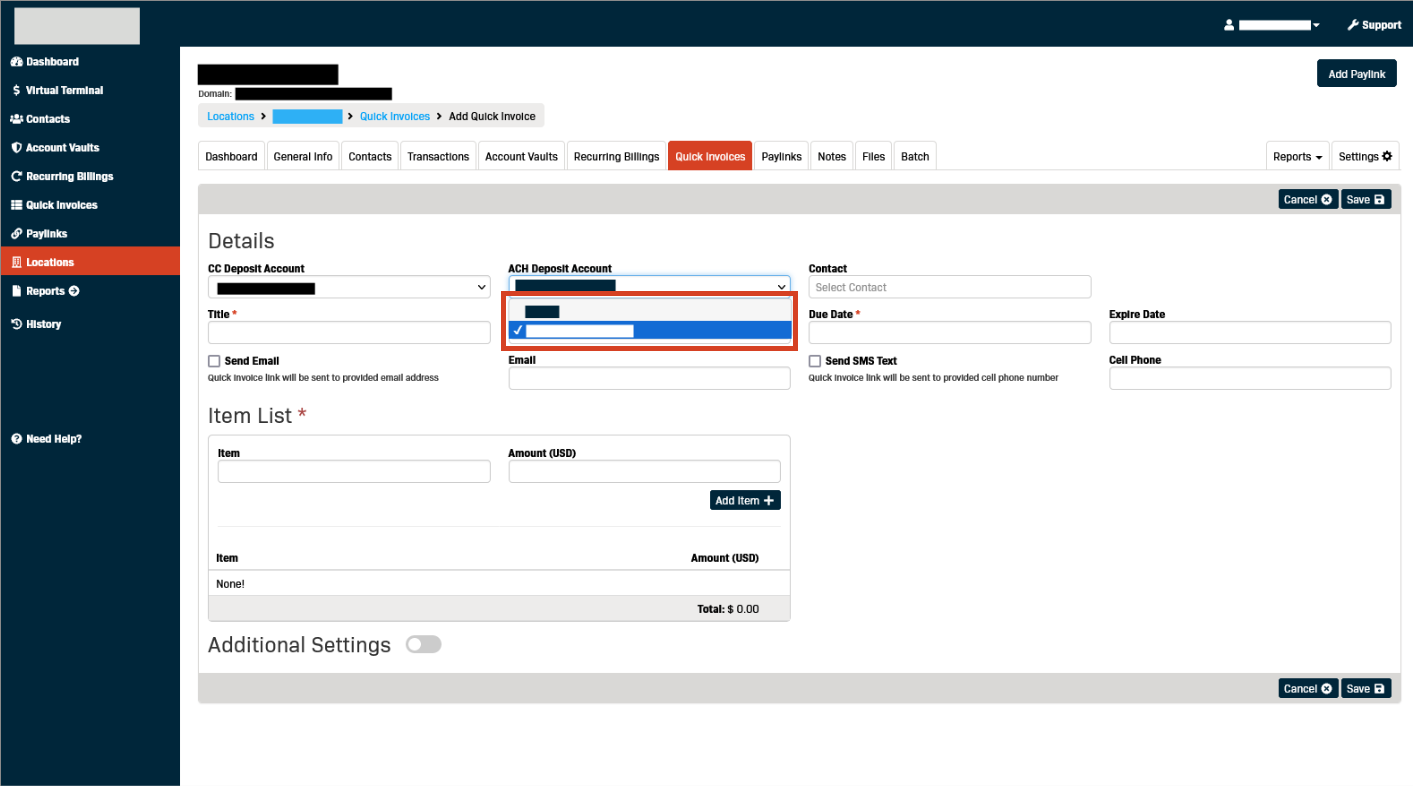
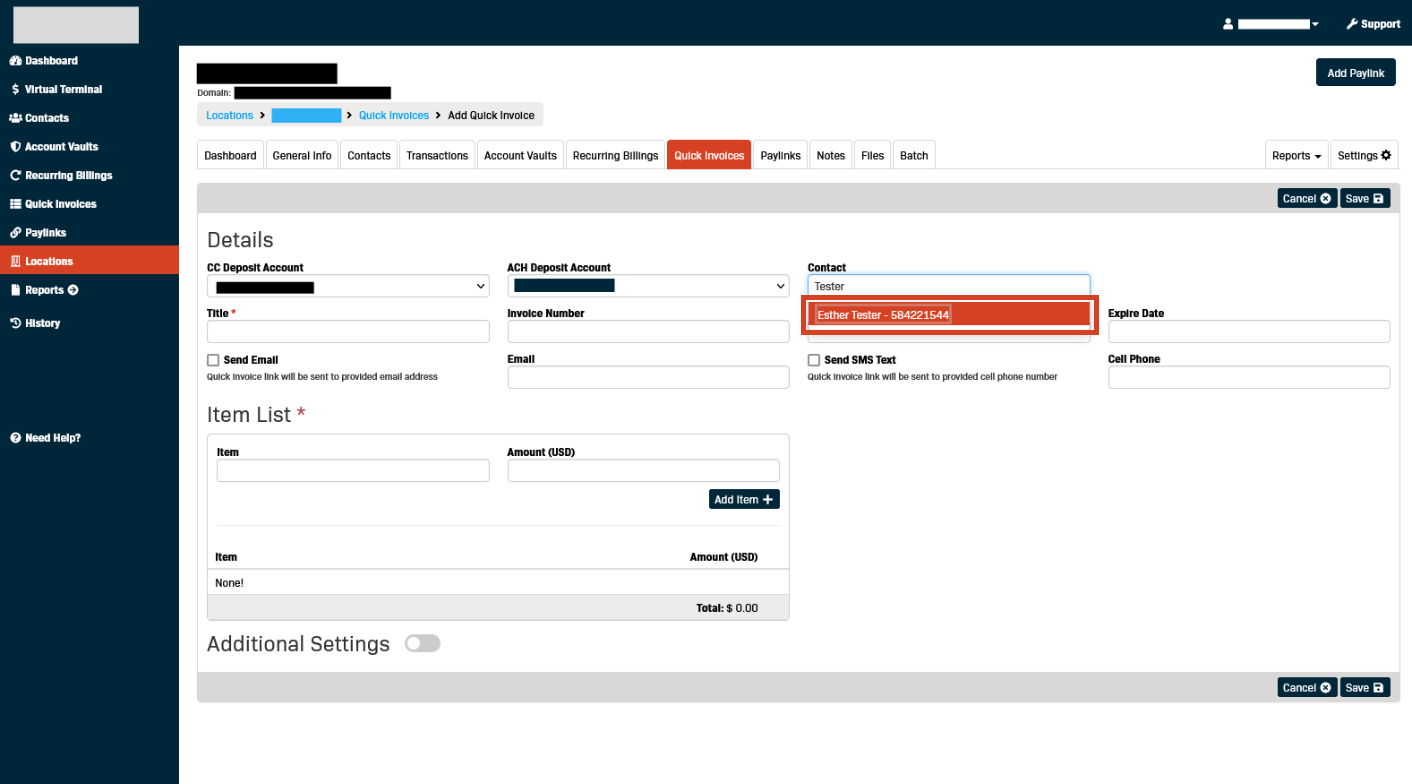
- Start typing the first or last name into the Contact field to bring up a selection of Contact records.
(Note) If you have a contact set up for the cardholder, entering the name of the contact in this field will ensure that payments made via the quick invoice will be posted back to the contact’s profile. If you are creating the quick invoice under the contact profile, it will automatically associate the quick invoice with that contact.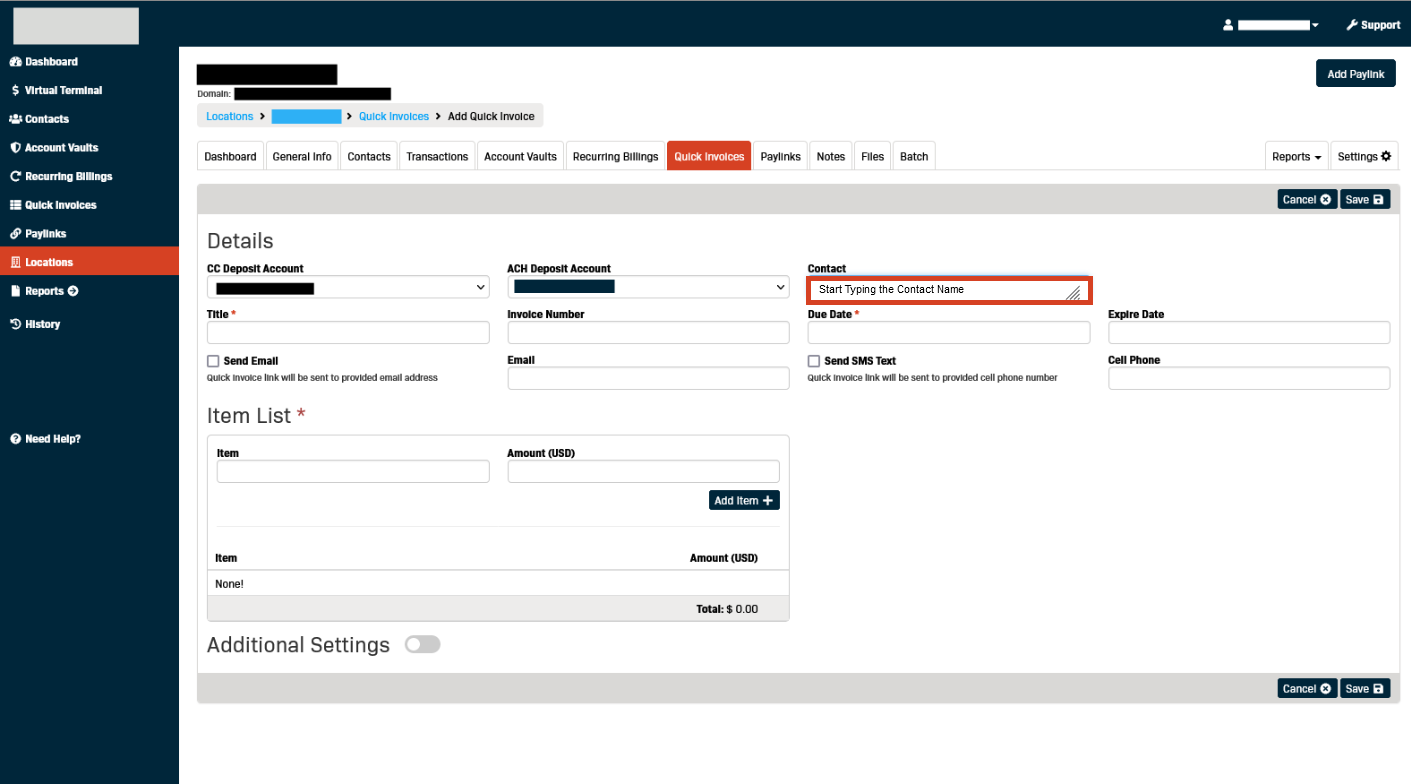
- Click to select the correct Contact record.
- (Required Field) Enter a Title for the Quick Invoice.
(Note) Title: This is how you will identify the quick invoice. The title will not be visible in the email.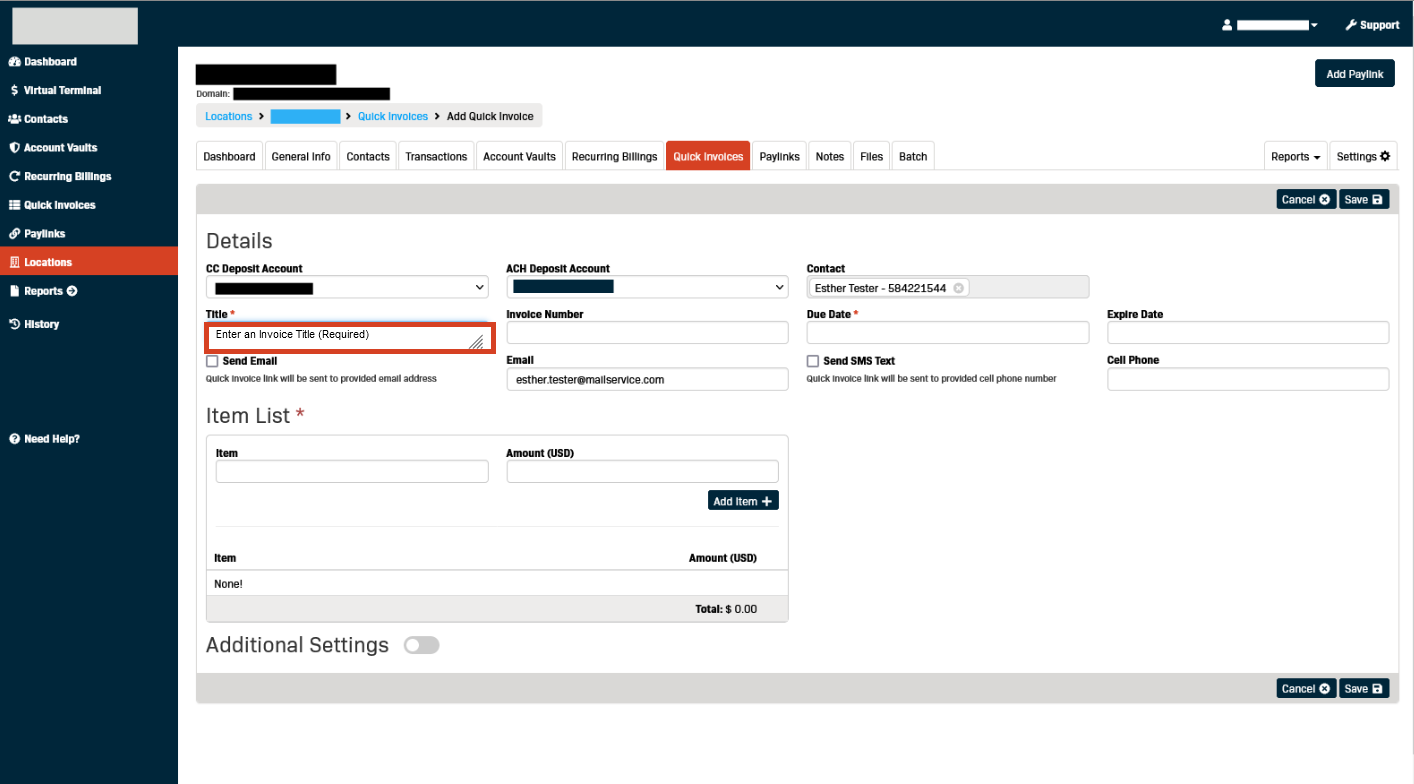
- Enter an Invoice Number(if applicable).
(Note) Invoice Number: This is an optional field that can help you identify the quick invoice. This number will be visible in the subject line of the email.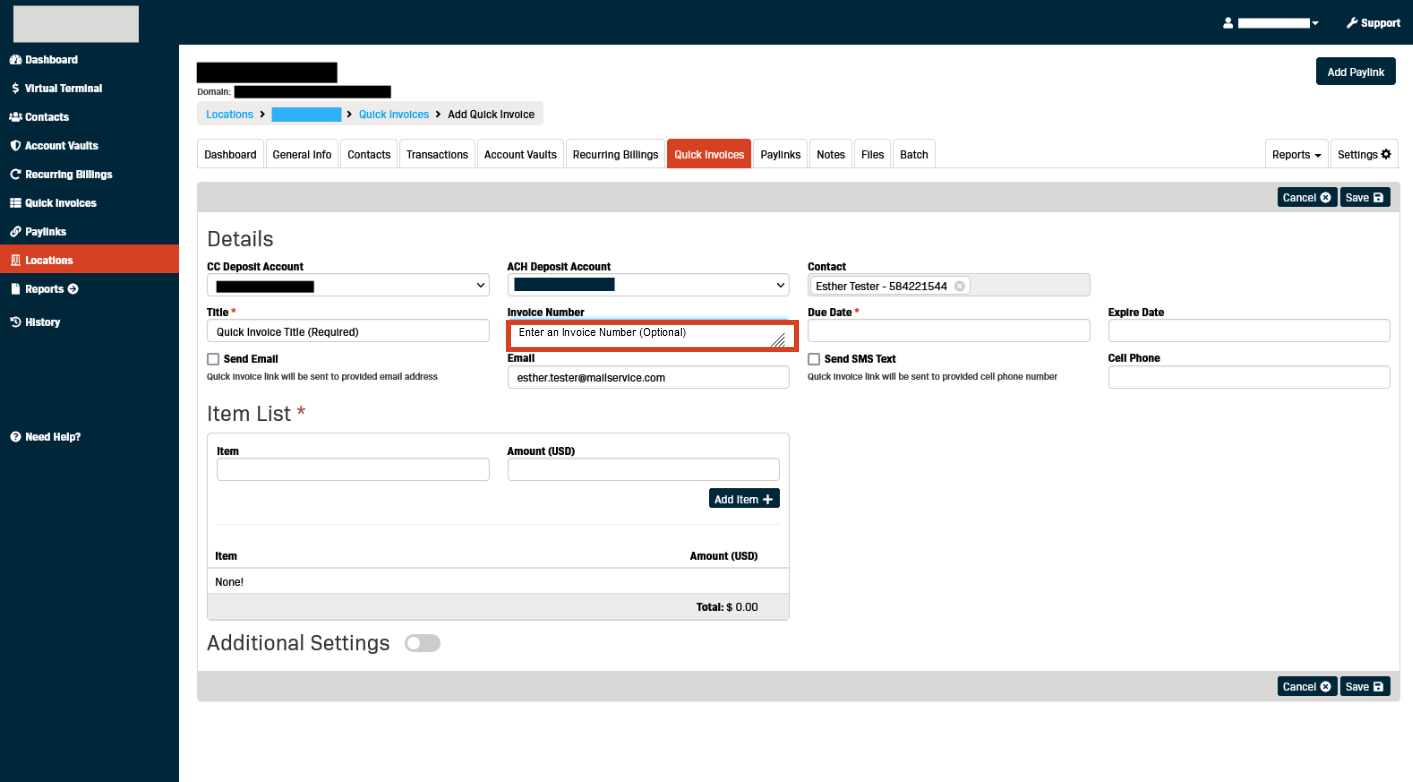
- (Required Field) Use the date selector to set the Quick Invoice's Due Date.
(Note) Due Date: This date will be displayed in the email as the invoice's due date.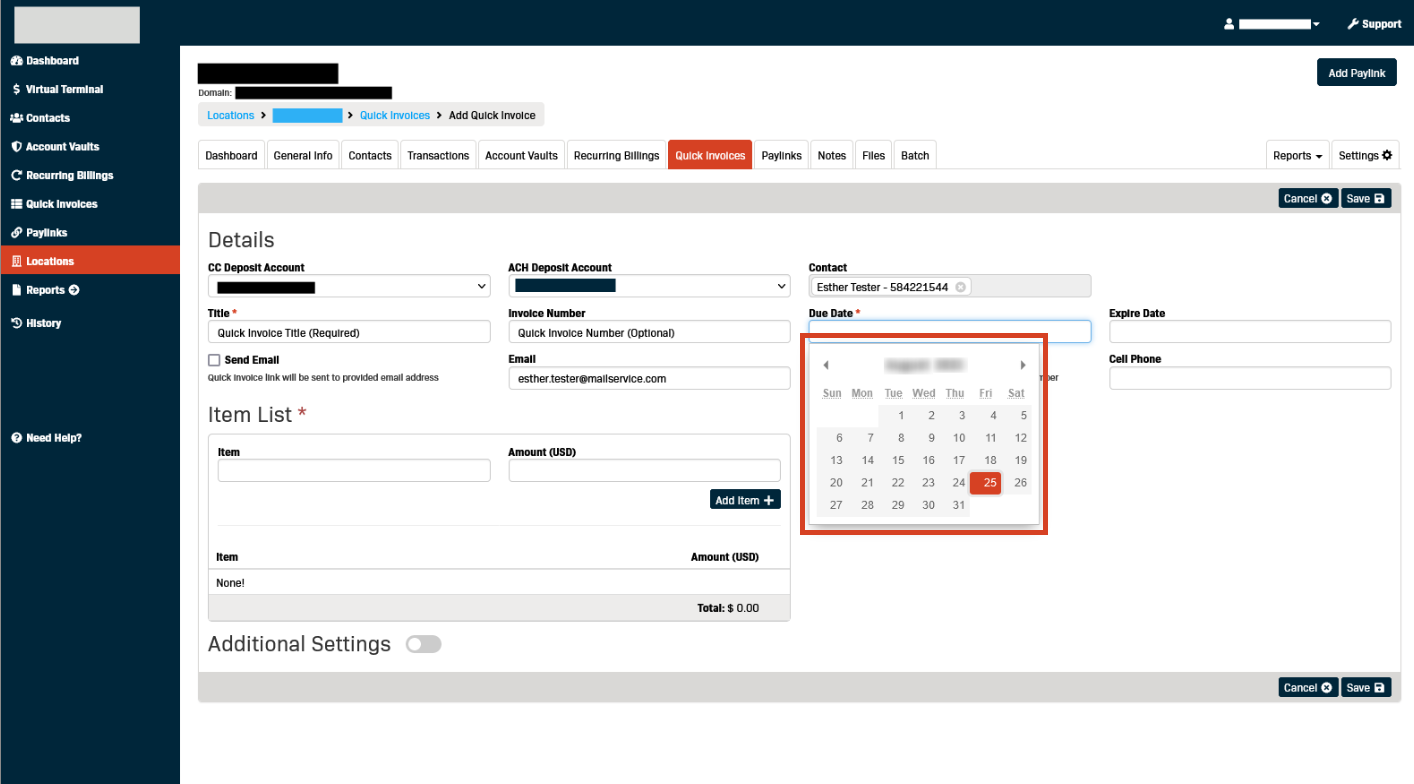
- Use the date selector to set an Expire Date for the Quick Invoice (if desired).
(Note) Expire Date: This is the date the invoice can no longer be used and will display a status of Closed.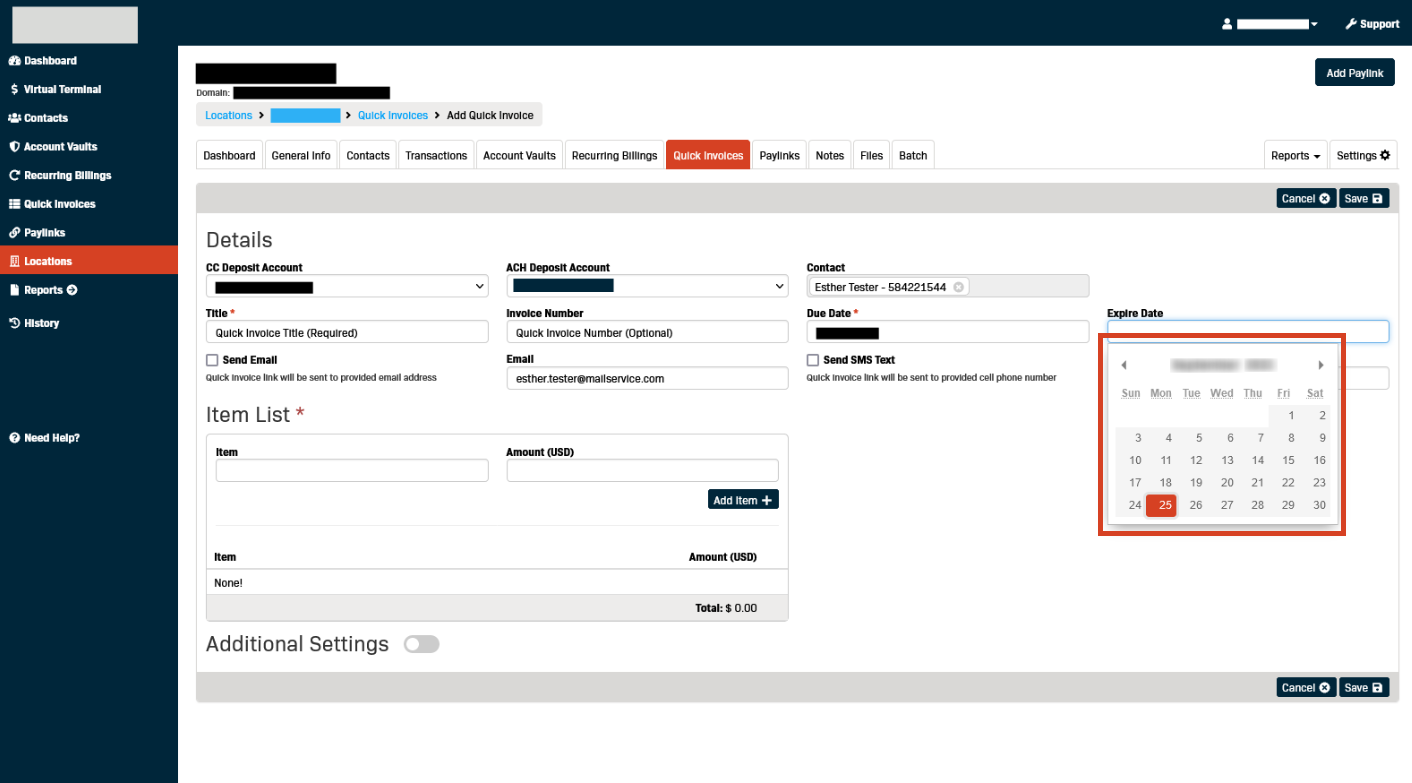
Select a Delivery Method
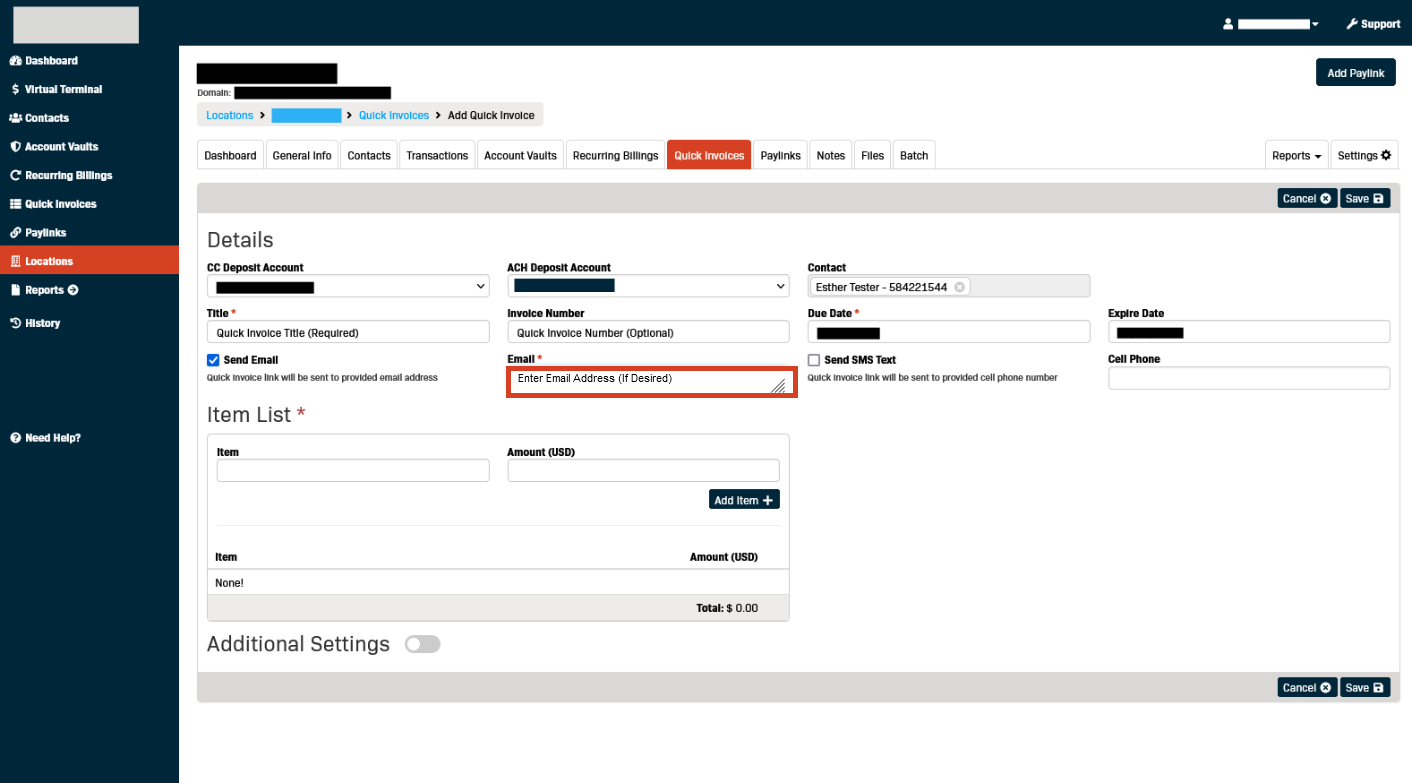
- Click the Send Email checkbox to automatically deliver the Quick Invoice by email as soon as it is created.
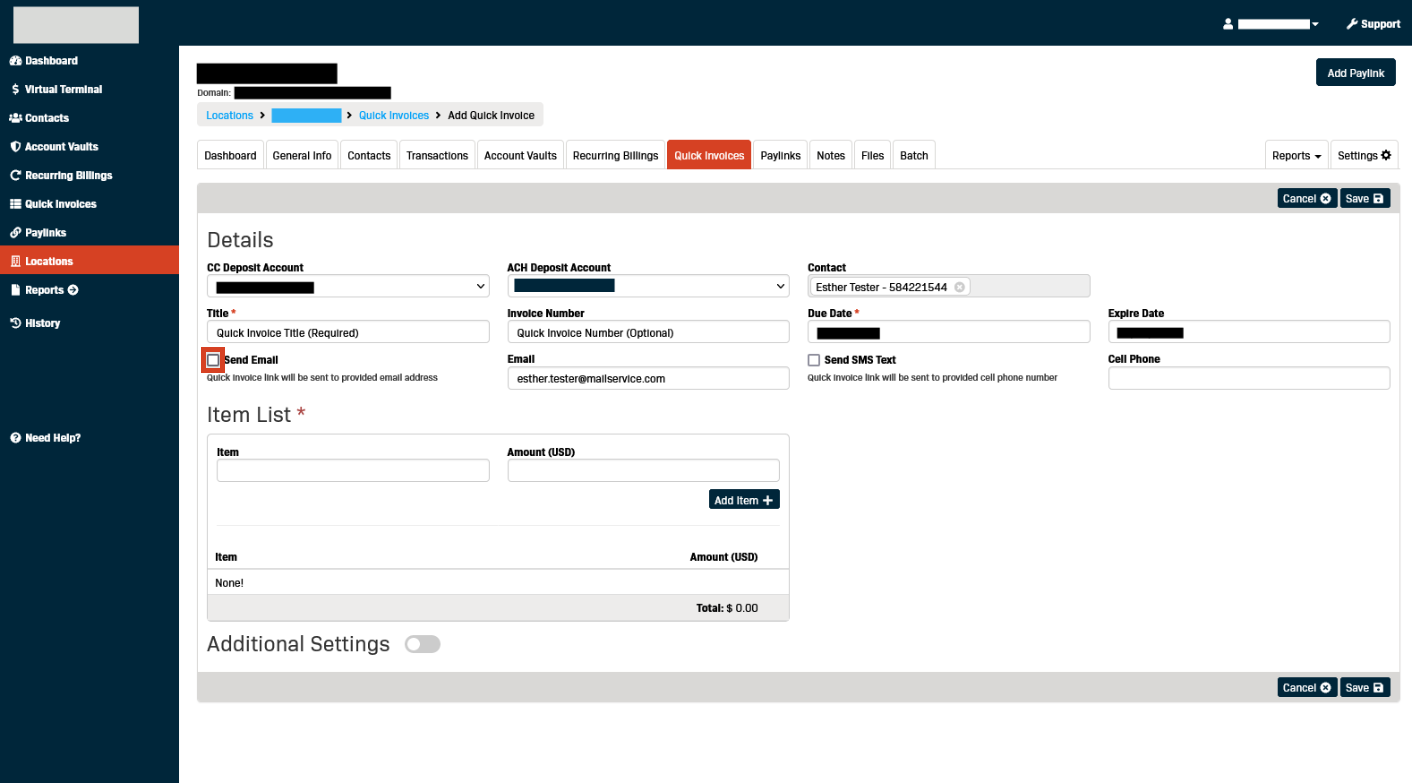
- The Email field will auto-populate if the Contact's record has an email saved.

- If the Contact wants the Quick Invoice delivered to a different email address, the new address can be entered into the Email field.
- Click the Send SMS Text checkbox to deliver the Quick Invoice by text (SMS) message.
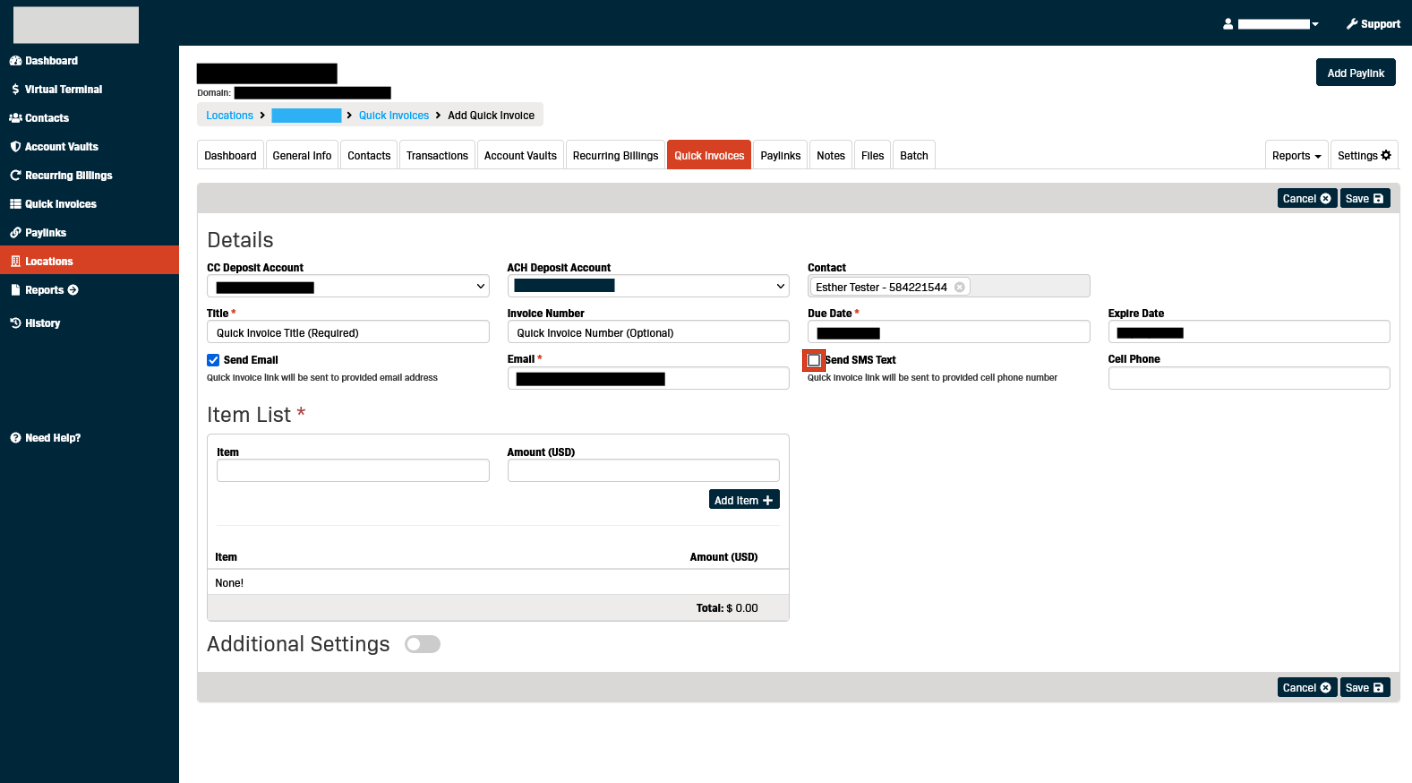
- The Cell Phone field will auto-populate if the Contact's record has a cell number saved.
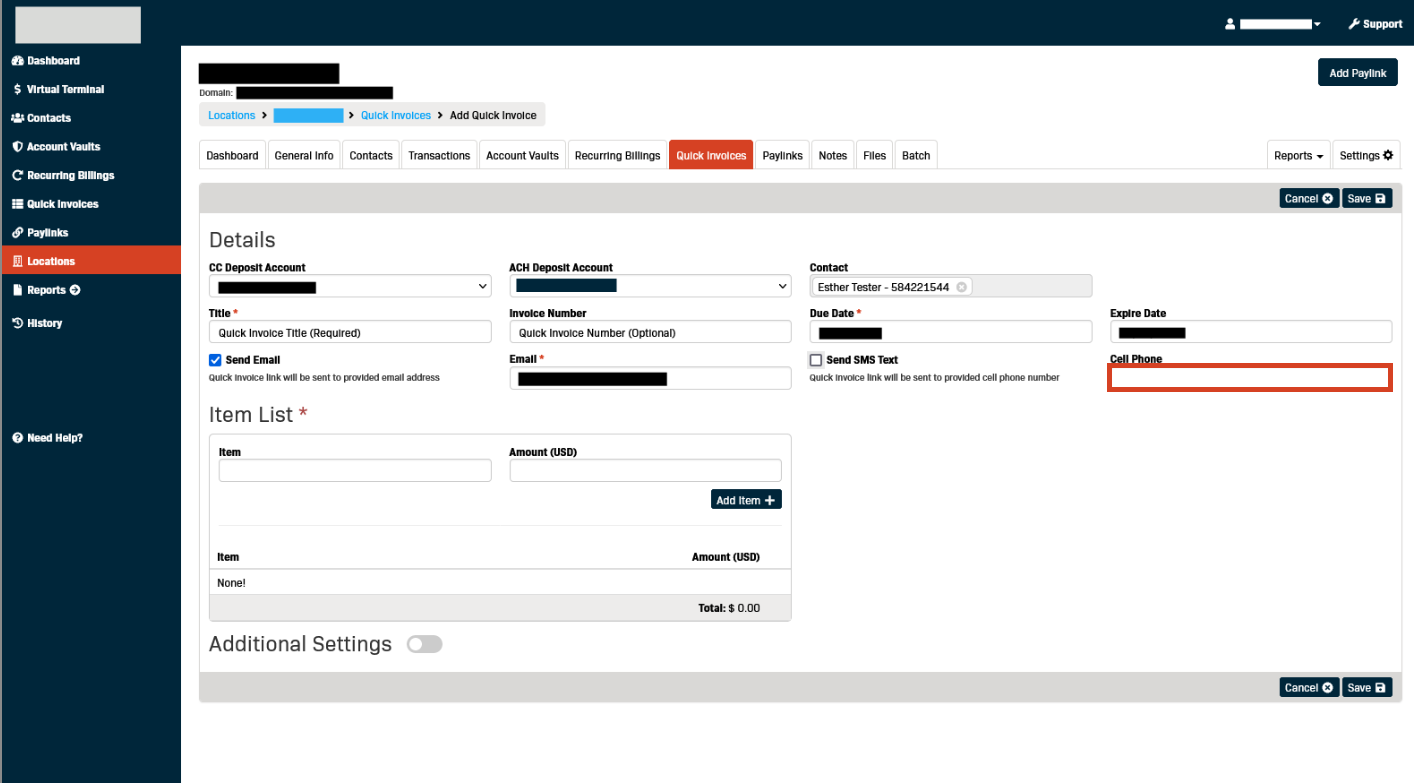
- If the Contact record doesn't include a Cell Phone number, or if they want the Quick Invoice delivered to a different cell number it can be entered here.

Enter the Items to Invoice
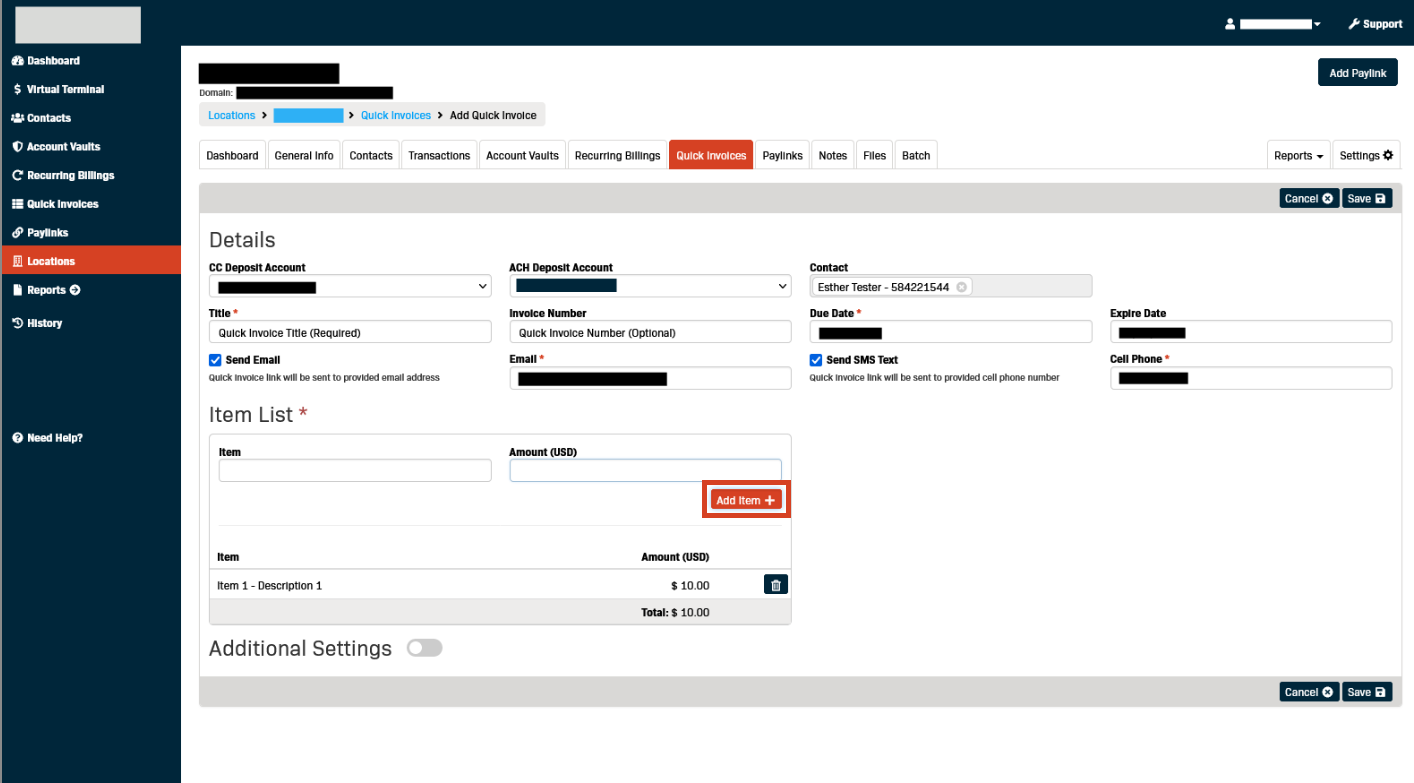
- (Required Field) Enter at least one Item name and/or description.
(Note) Item: This is a description of the items or services sold.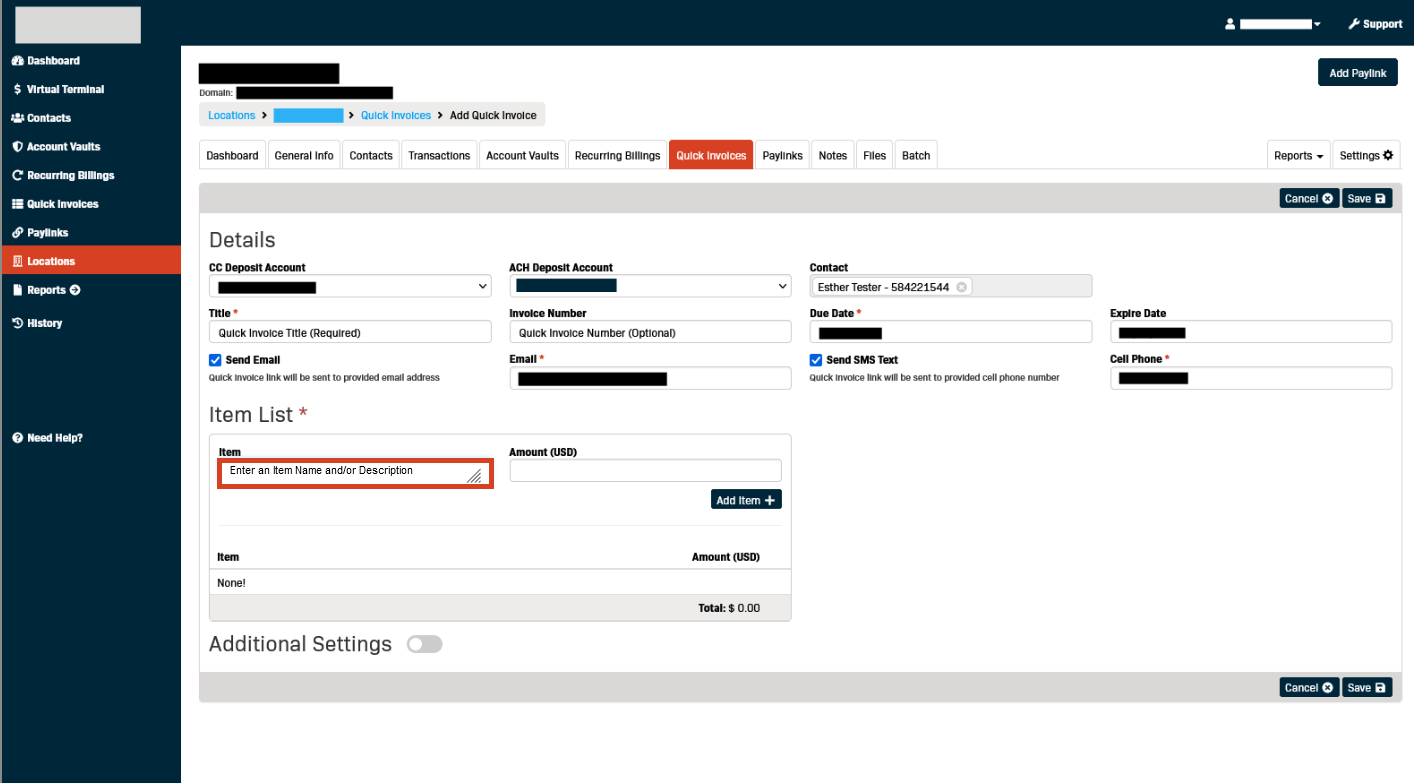
- Enter the Amount of the Item in dollars and cents.
(Note) Amount: This is the amount owed by the cardholder.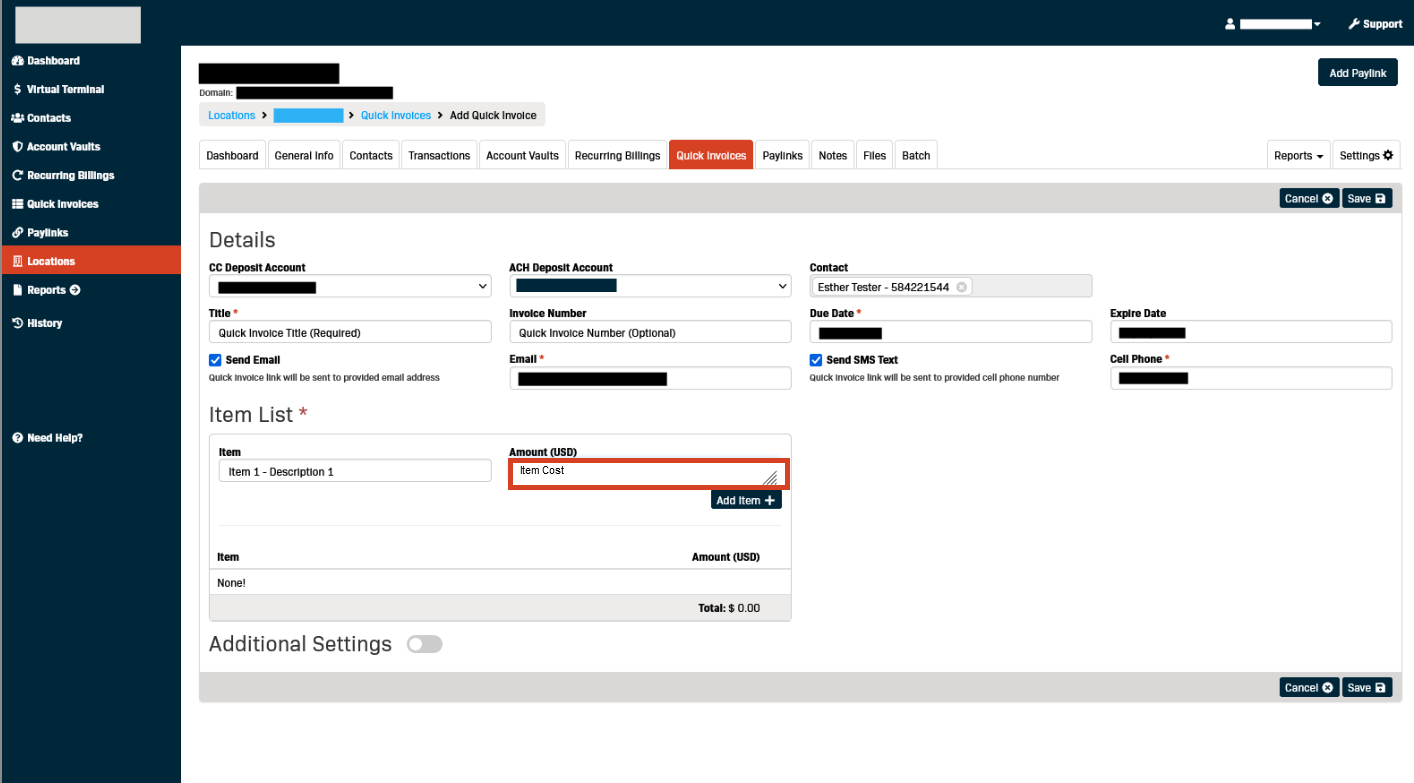
- Click to Add Item.
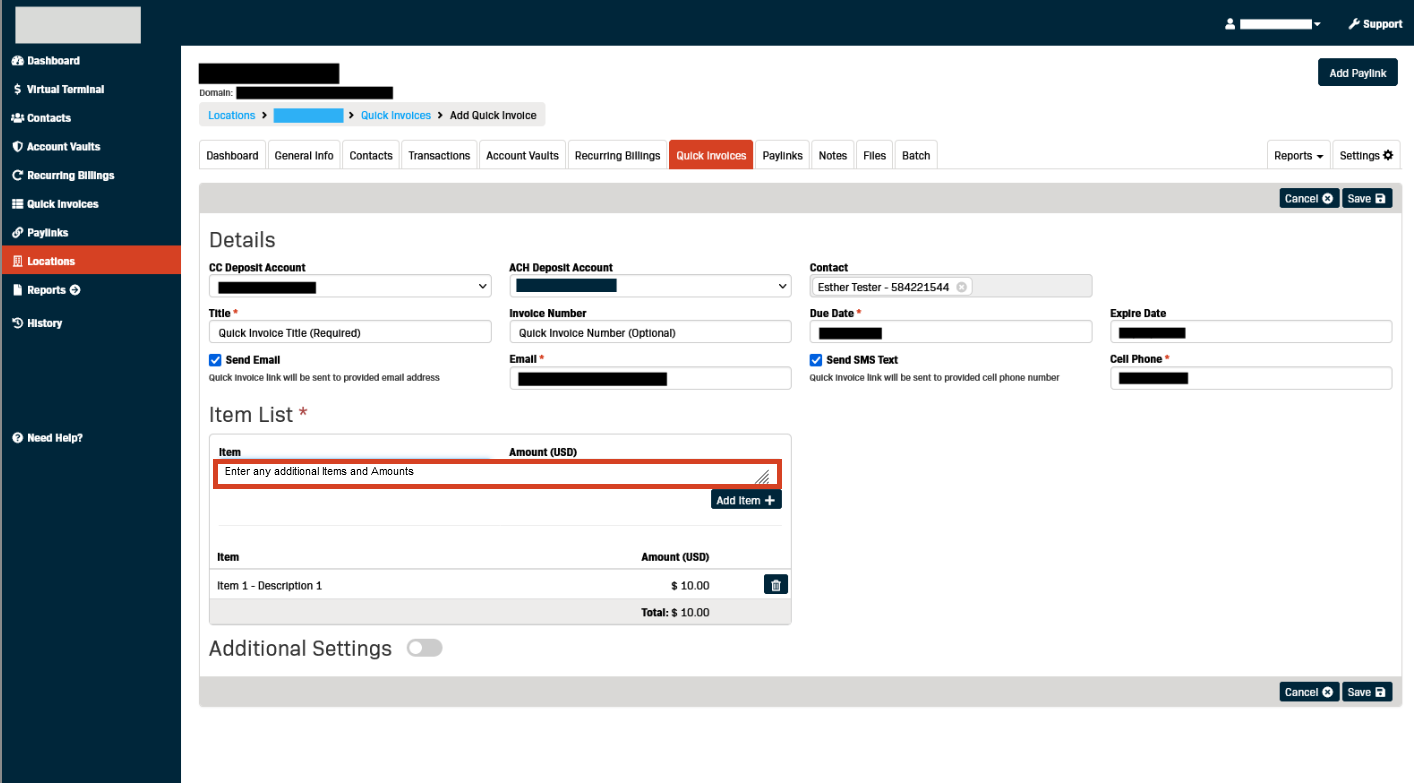
- Enter any additional Items and Amounts (as required).
- If any Items need to be removed from the Quick Invoice they can be deleted in the list section.
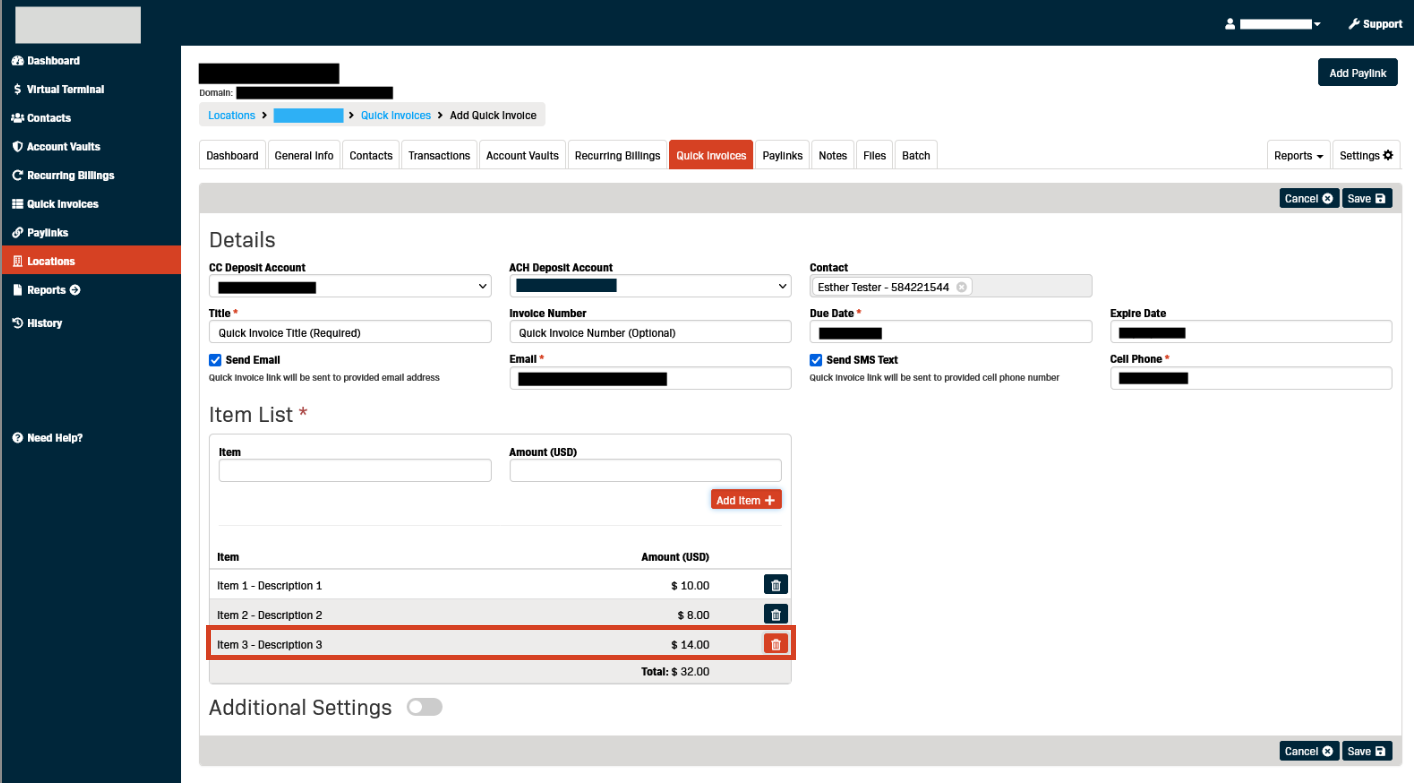
- Click the Trash button to the left of the Item row to delete that item.

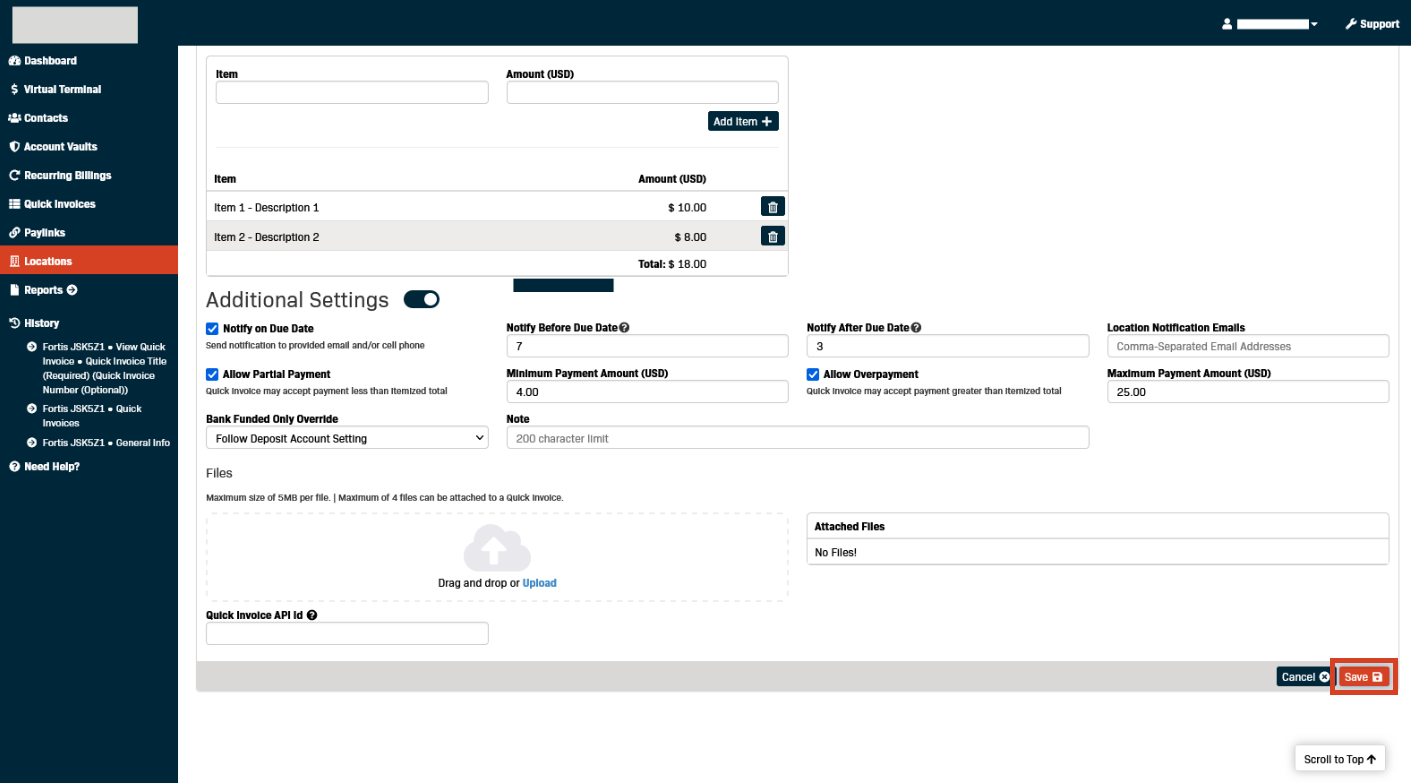
- Once everything in the Details section looks correct there are two options:
- the Quick Invoice can be Saved and Sent
- the Additional Settings can be reviewed and any desired changes made for the current Quick Invoice
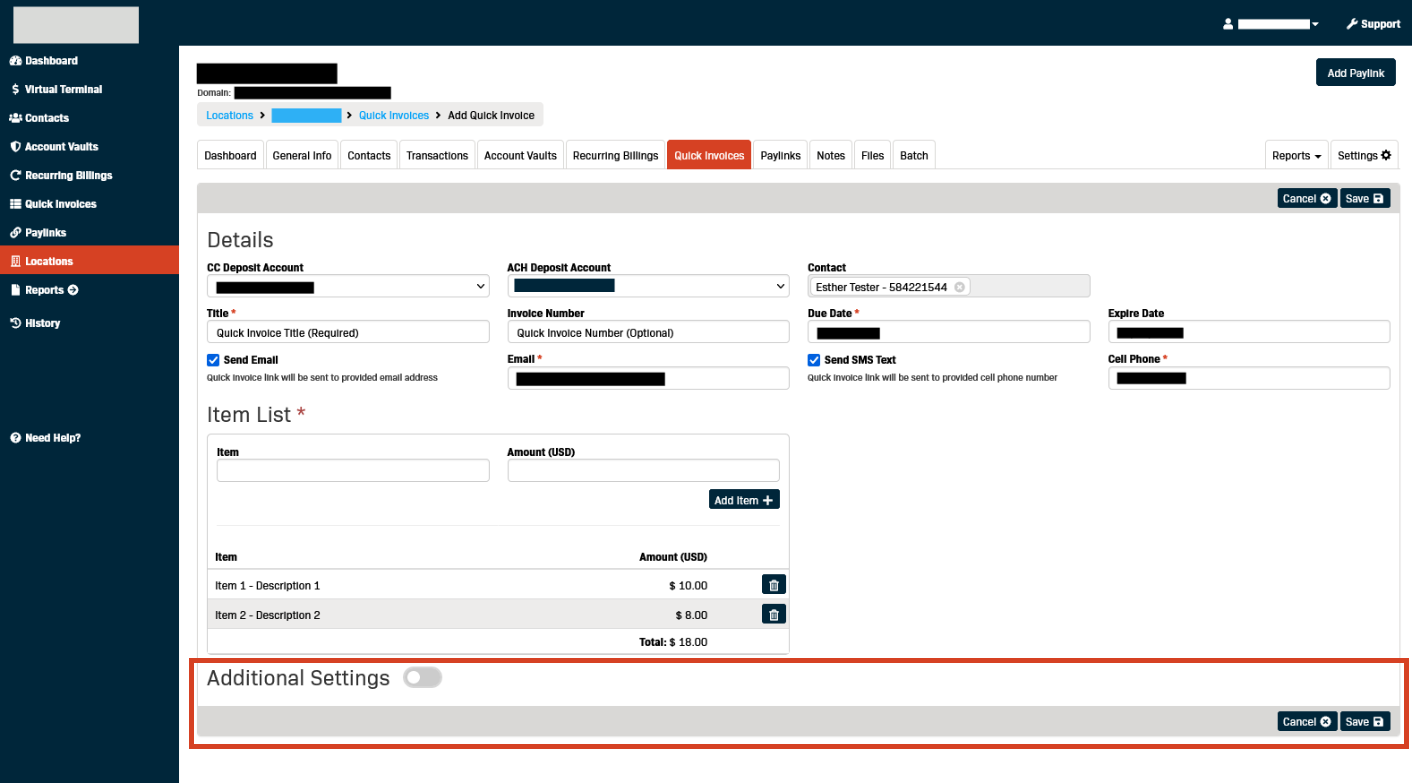
Additional Settings (Optional)
- Click the toggle button to open the Additional Settings section.
(Note) All the fields within the Additional Settings section of the Quick Invoice are pre-populated based on the global Quick Invoice settings for the Location. Changing any of the settings here will change them for the current Quick Invoice only.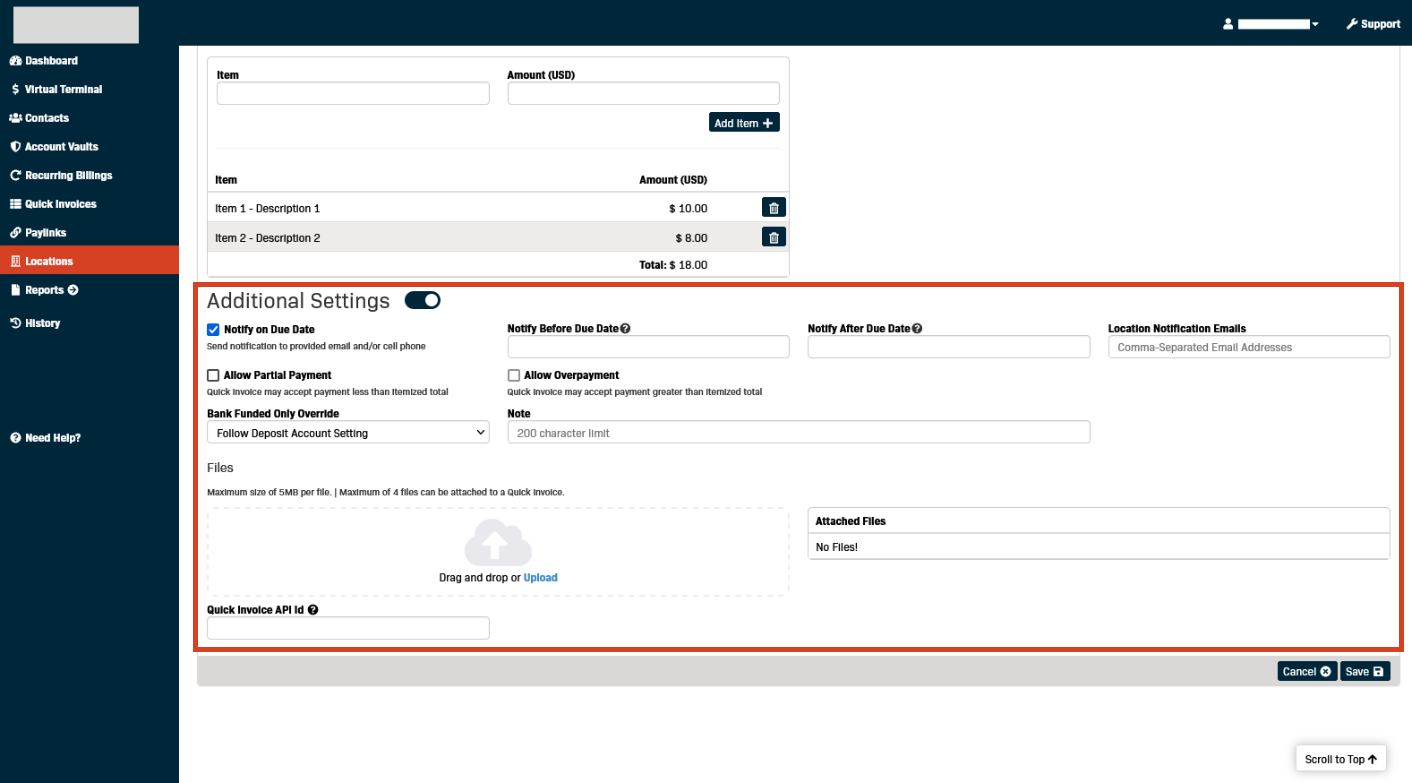
- Notify On Due Date - Use the checkbox to set whether a notification will be sent to the Contact on the day the Quick Invoice is due.
(Note) This setting determines whether or not a notification will be sent on the due date.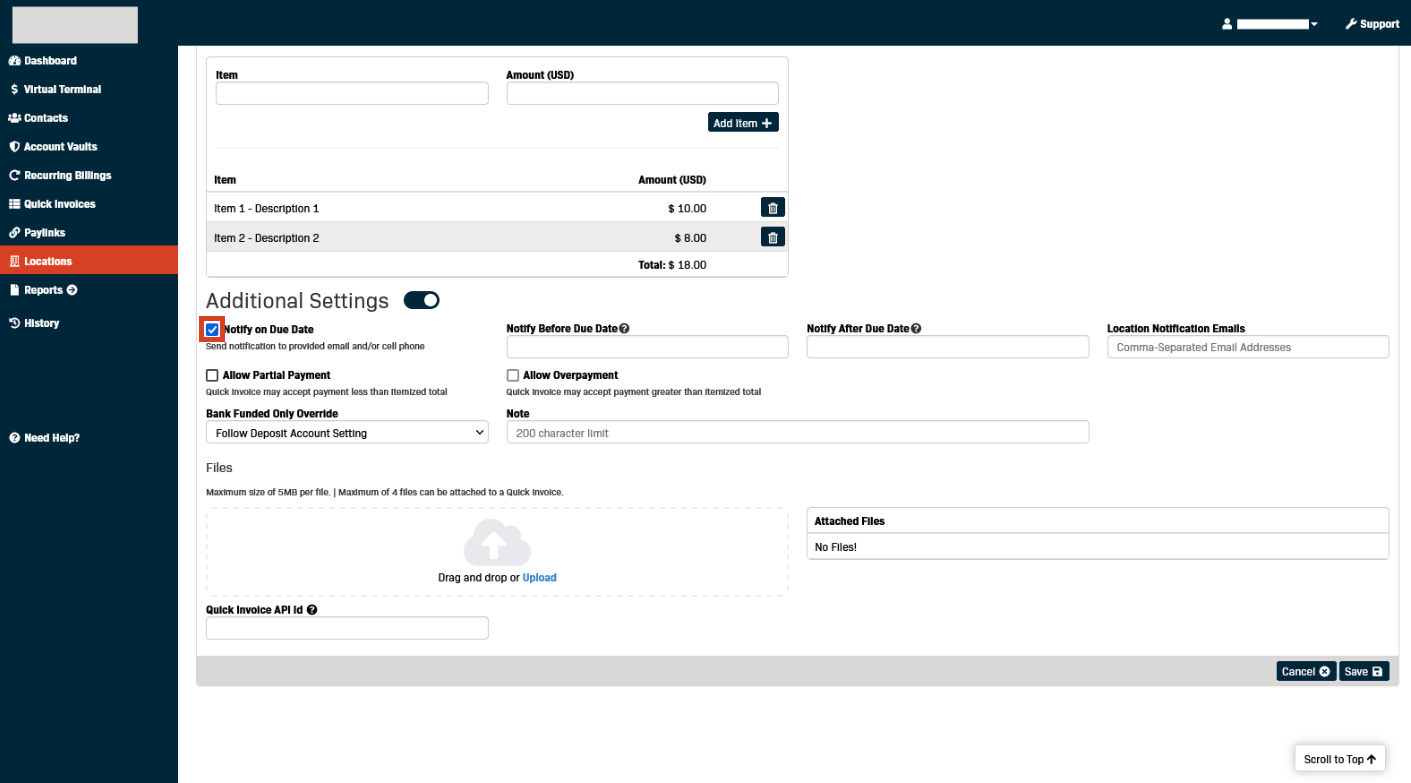
- Notify Before Due Date - Enter the number of days before the Quick Invoice is due to send the Contact a notification.
(Note) The number entered in this field will determine the number of days prior to the due date the cardholder will receive a notification email if the invoice has not yet been paid. (Example: Entering “3” in this field will result in an email being sent 3 days before the selected due date).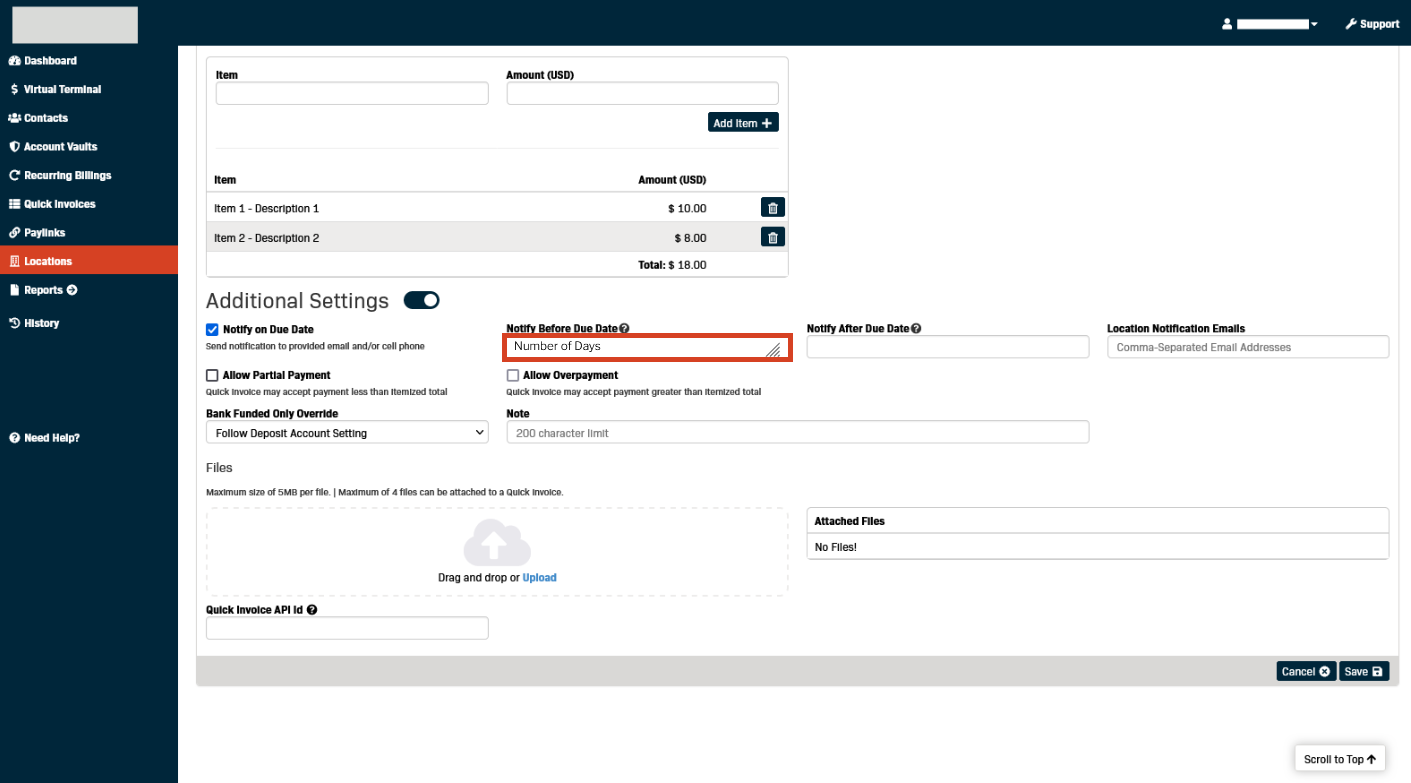
- Notify After Due Date - Enter the number of days after the date the Quick invoice is due to send the Contact a notification.
(Note) The number entered in this field will determine the number of days after the due date the cardholder will receive a notification email if the invoice has not yet been paid. - Location Notification Emails - Additional email addresses can be entered here if you would like the invoice to be sent to multiple email addresses.
(Note) Each email address must be separated by a comma ( , ).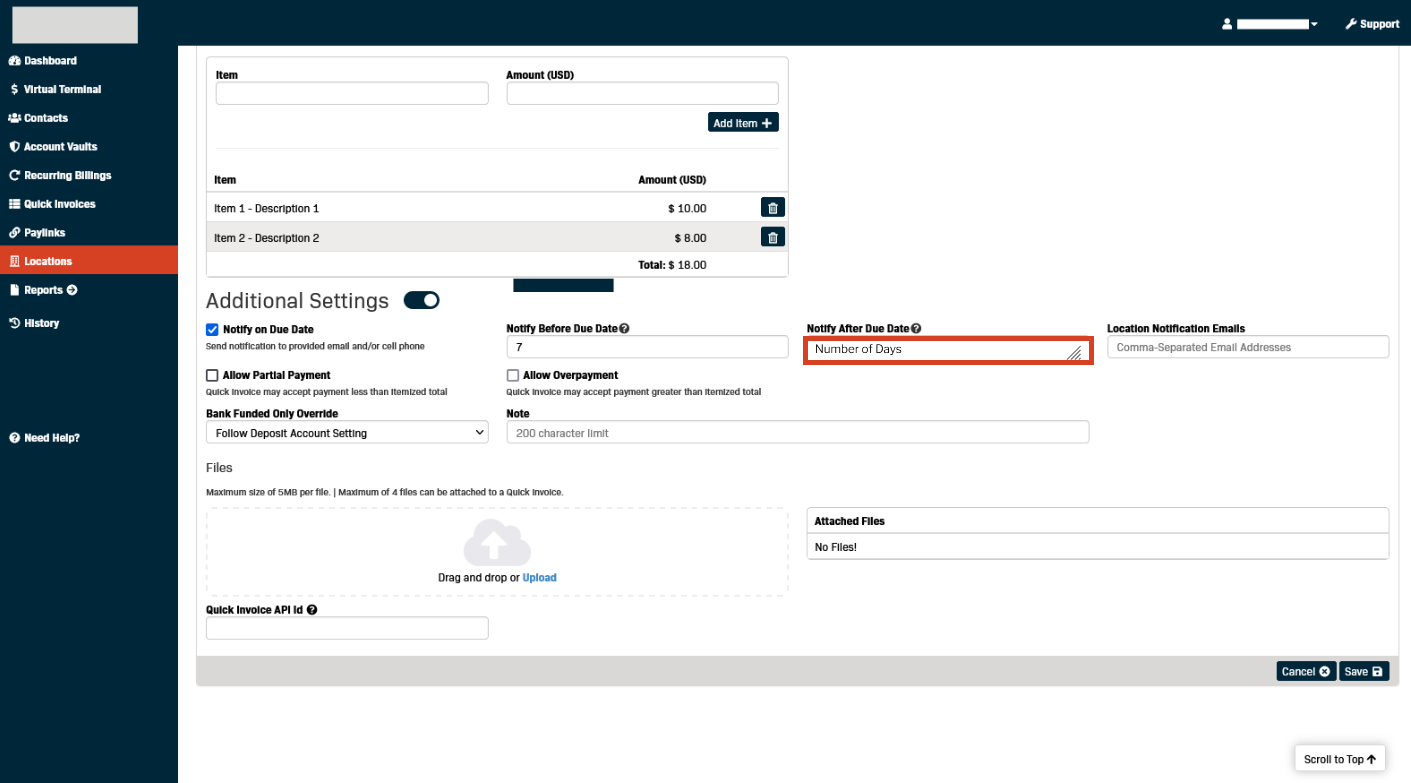
- Click the Allow Partial Payment checkbox if you want to accept a payment less than the itemized total against the Quick Invoice.
- Once 'Allow Partial Payment' is checked the Minimum Payment Amount field will open.

(Note) It is highly recommended to enter a minimum payment amount if partial payments are accepted.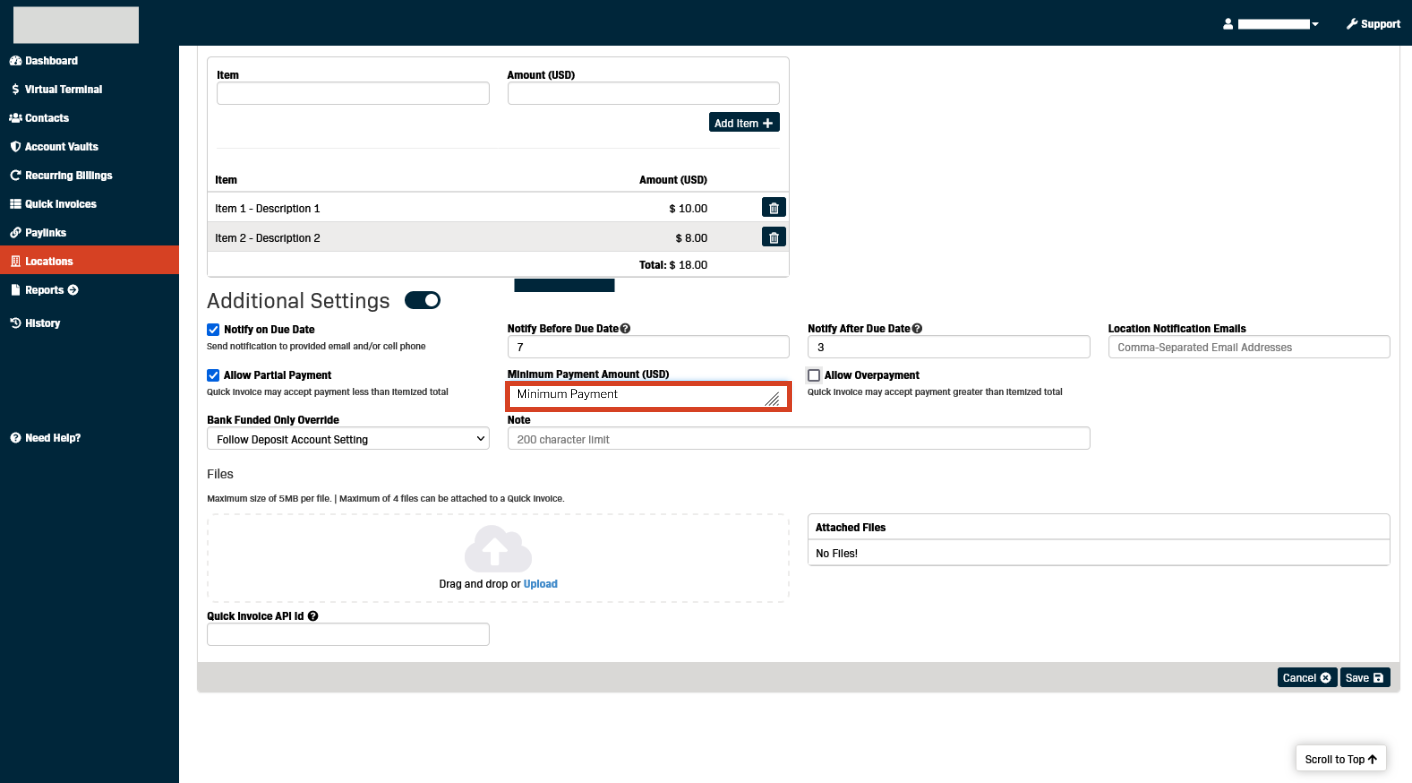
- Click the Allow Overpayment checkbox if you would like to accept a payment that is greater than the itemized total against the Quick Invoice.
- Once 'Allow Overpayment' is checked, the Maximum Payment Amount field will open.
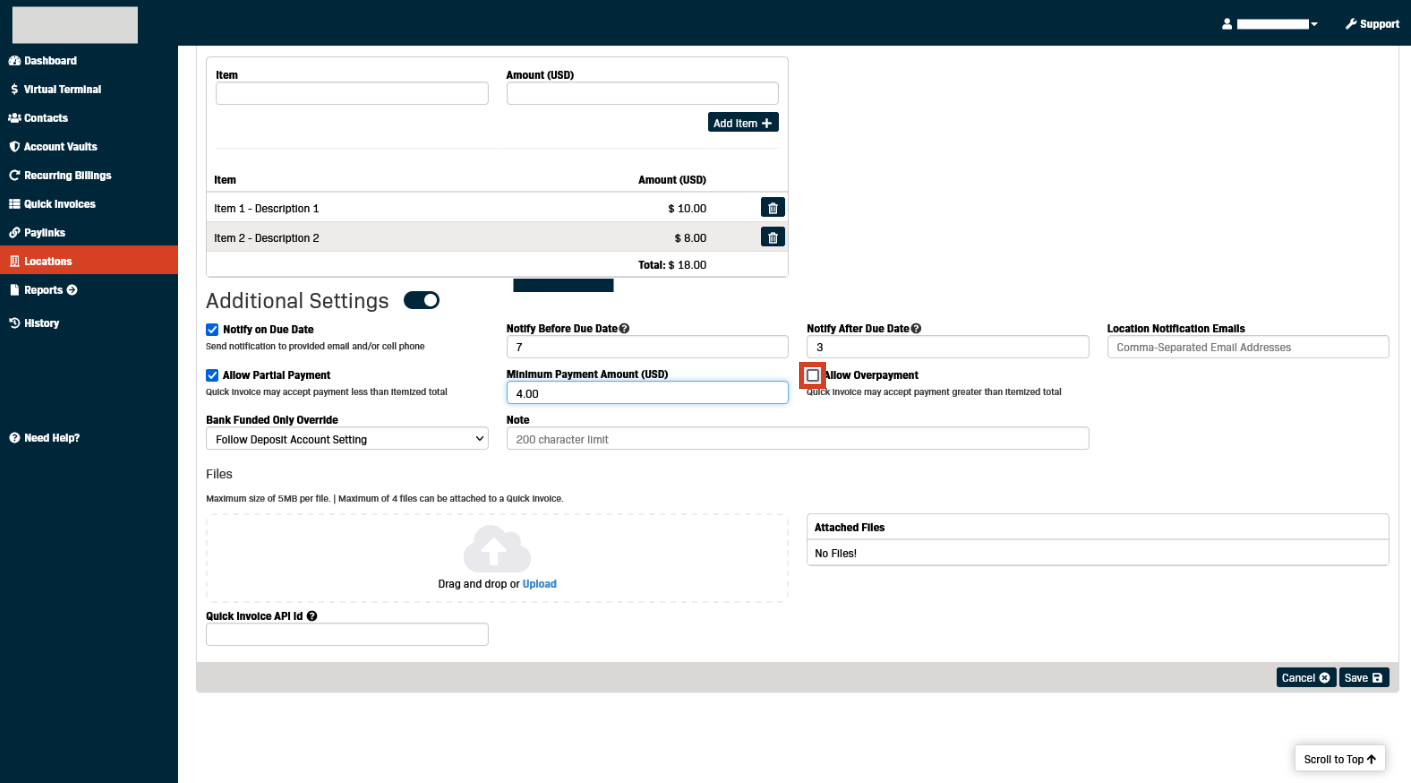
(Note) It is highly recommended to enter a maximum payment amount to prevent high-dollar payments from being entered in error.
Example:
Amount Due = $25.00
Payment Amount Entered = $2500
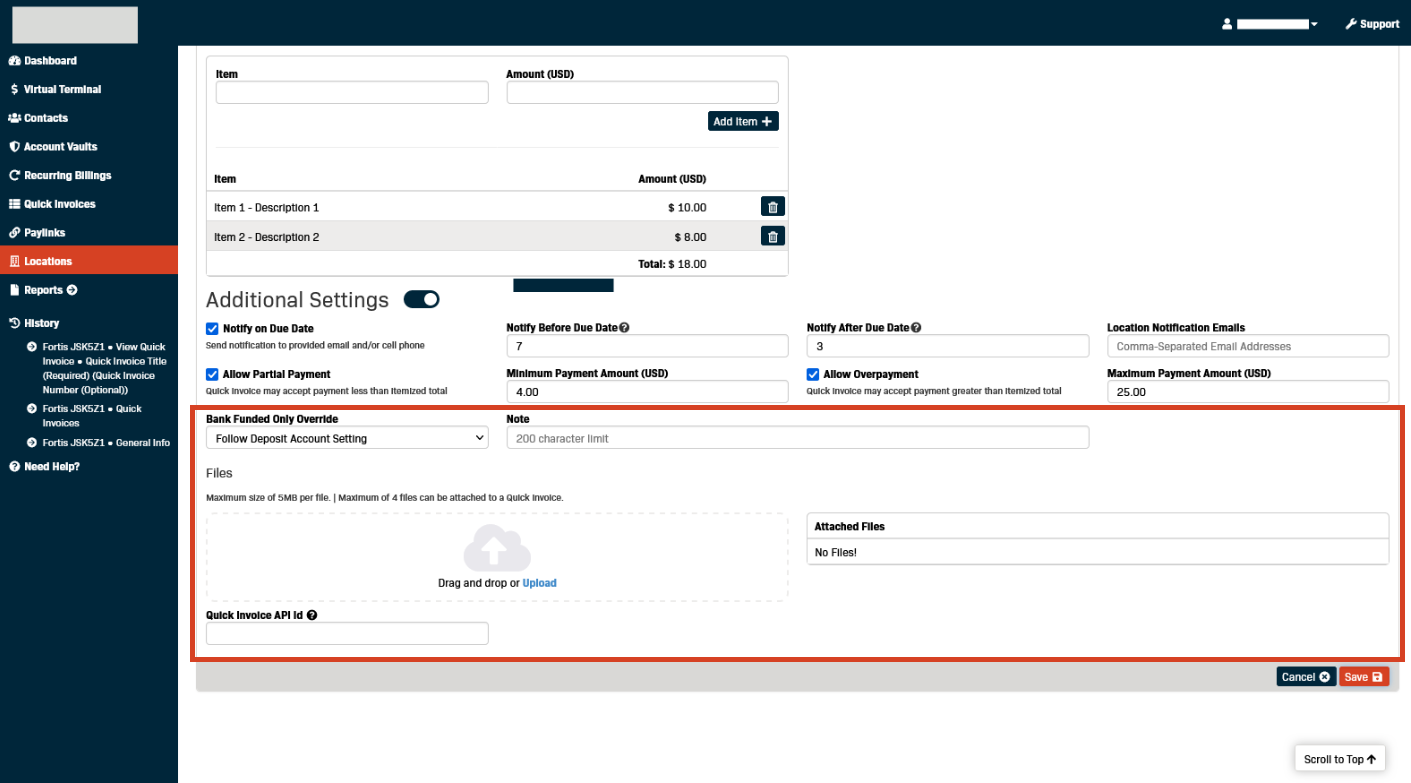
Other Additional Settings
- Change the Deposit Account settings for the Invoice.
- Attach any necessary Files to the Invoice.
- Assigning an API ID to the Invoice.
Review and Save the Quick Invoice
As the Quick Invoice will be delivered immediately after it is saved, it is highly recommended that you review it before saving it.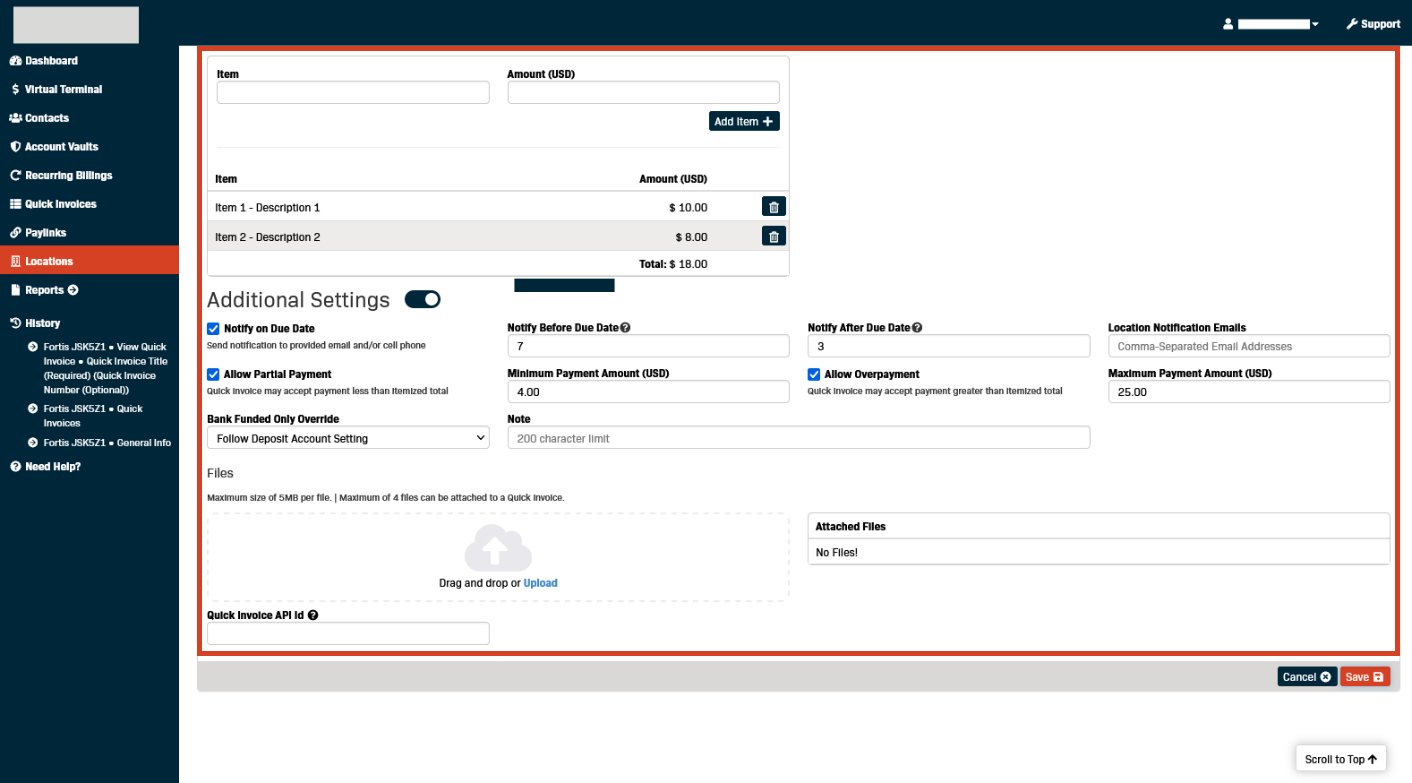
- Click Save to save and send the Quick Invoice.
- A banner message will appear confirming the Quick Invoice was saved and sent via the selected delivery method(s).
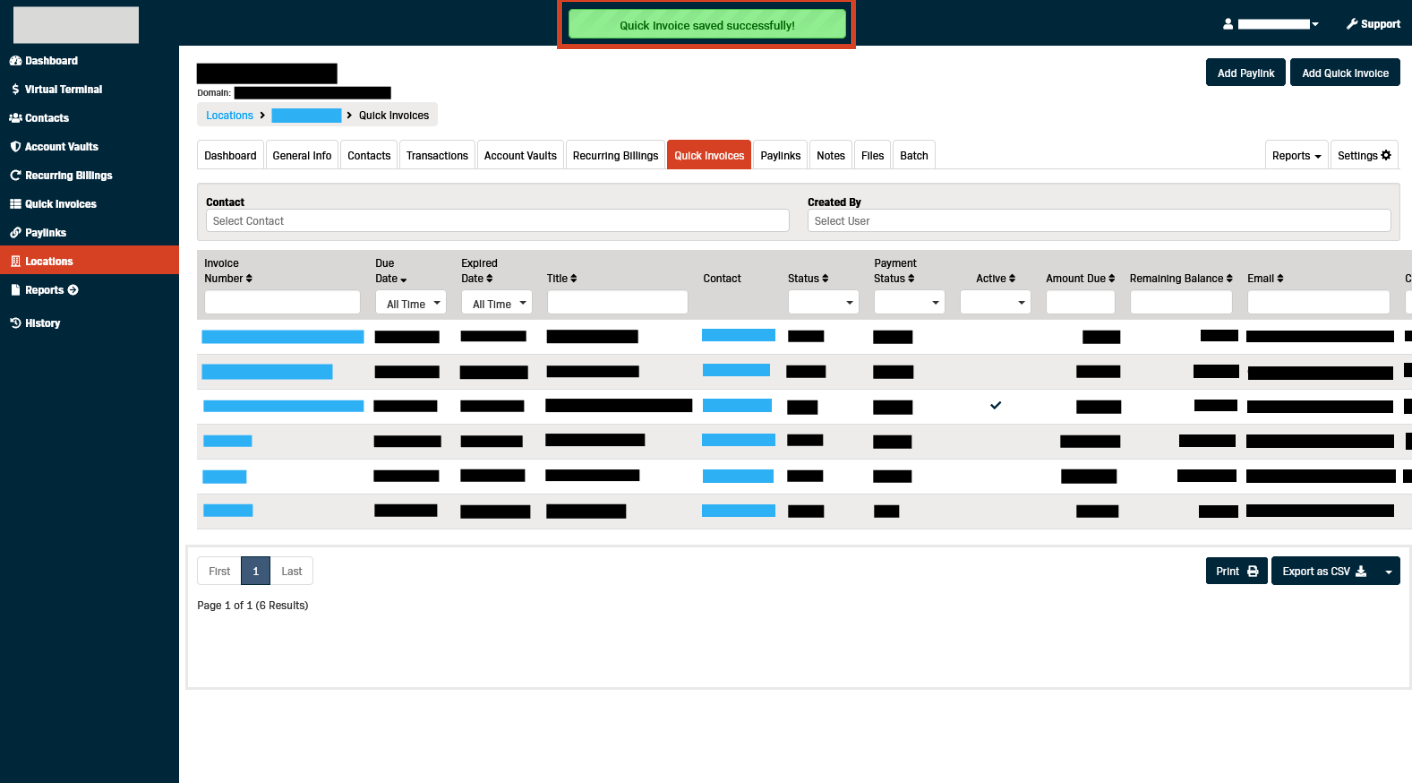
- The Quick Invoice is now complete.
Additional Actions
- Click the Invoice Number to view additional actions for the Quick Invoice.
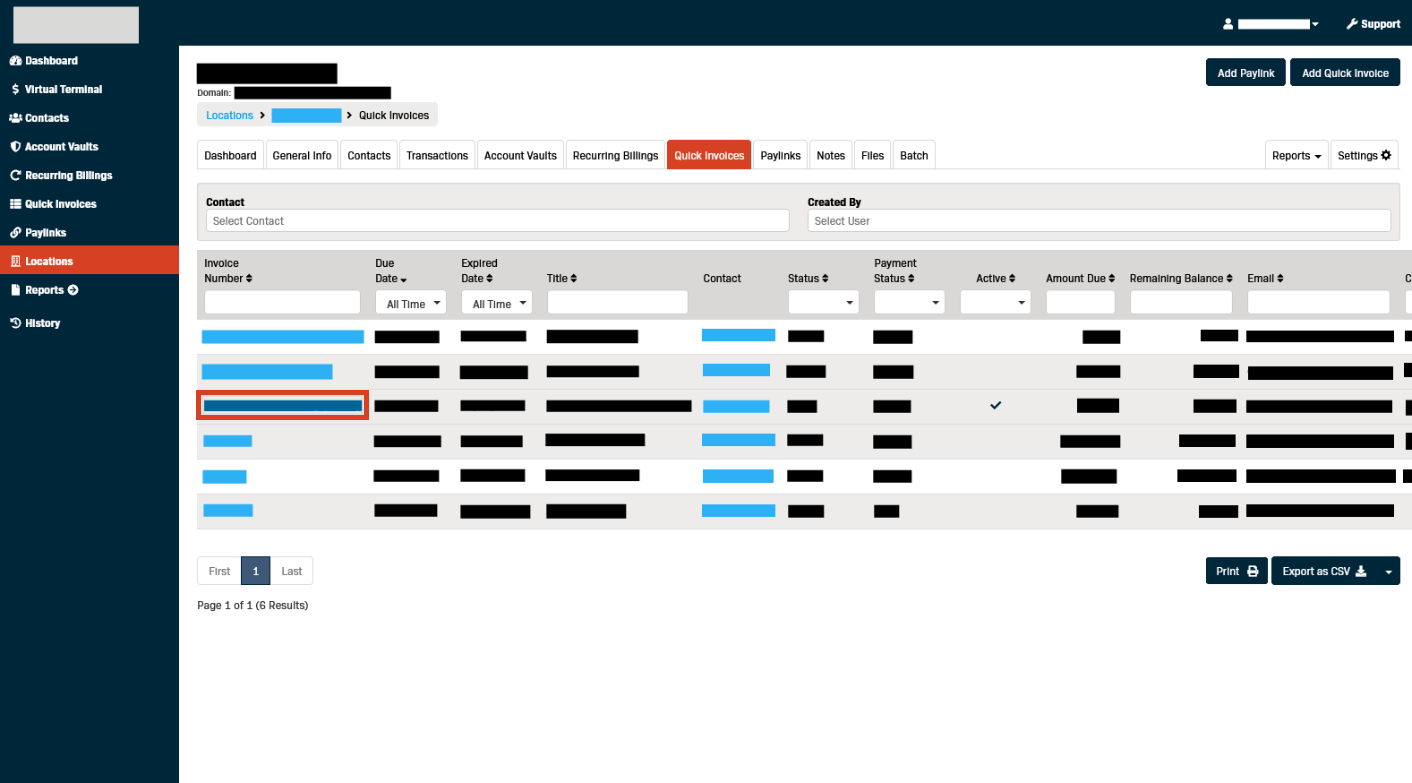
- Actions:
- Print - Print a hard copy of the Quick Invoice on any standard printer.
- Resend Email - If the Quick Invoice needs to be resent via email.
- Resend SMS - If the Quick Invoice needs to be resent via text message.
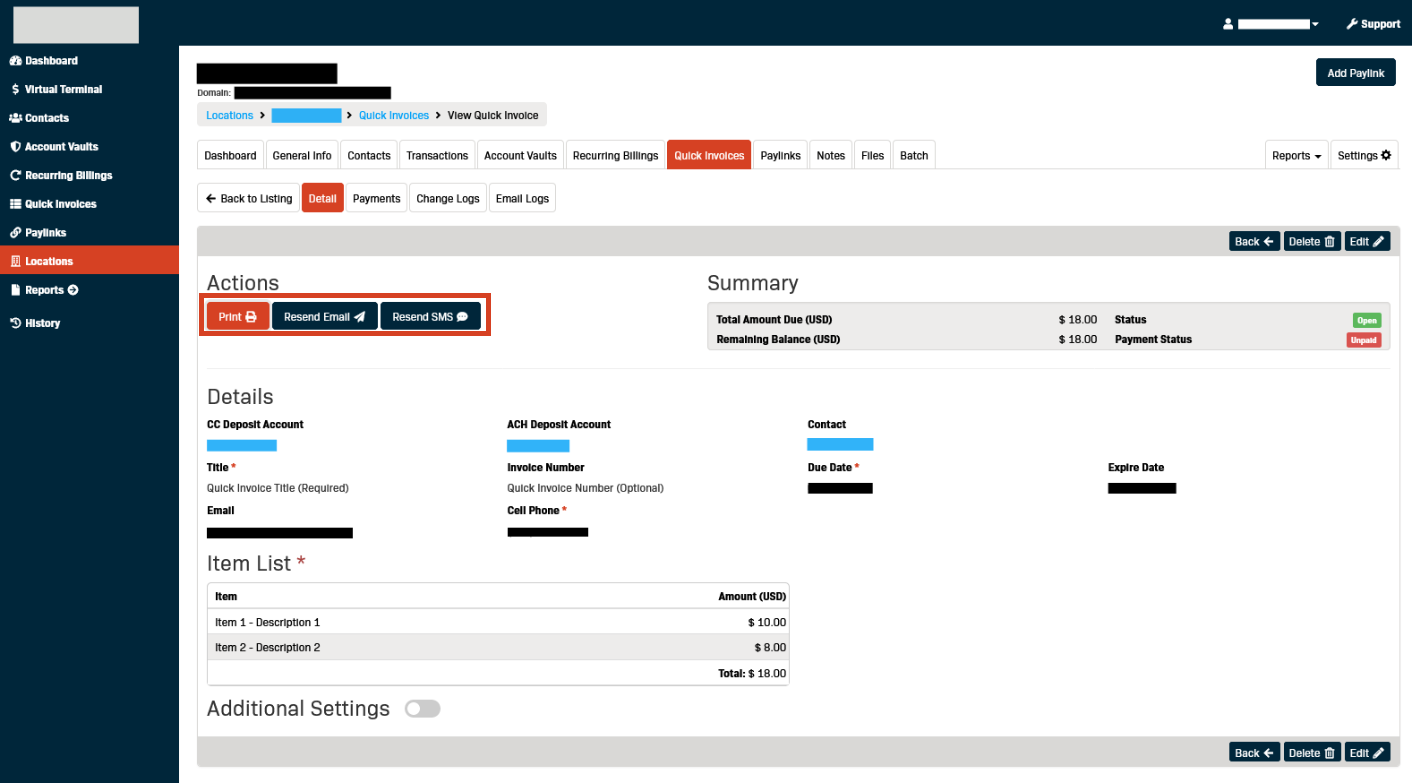
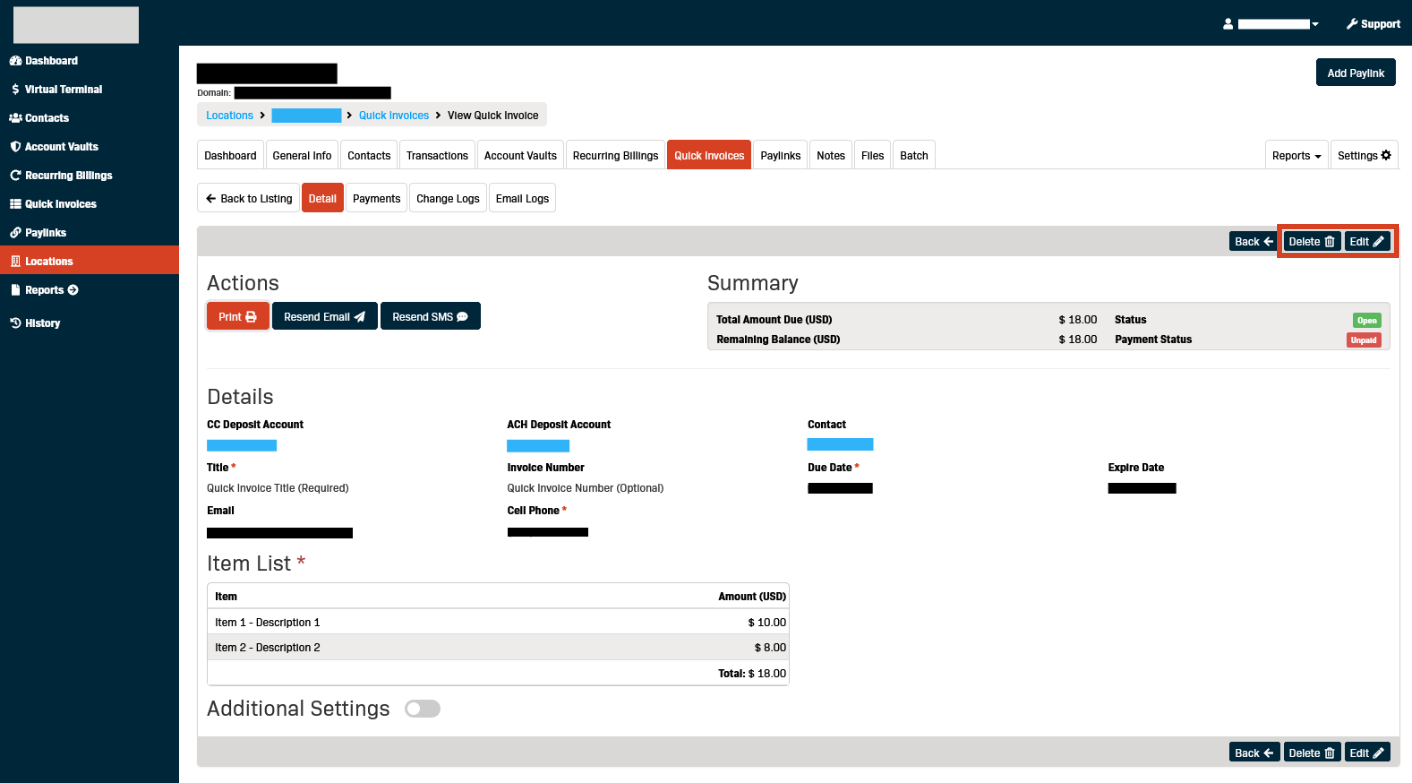
- The Quick Invoice can also be Deleted or Edited from this screen.
Frequently Asked Questions
Q: How can I delete a Quick Invoice?
A: Quick Invoices can be deleted by clicking on the red Delete button on the right side of each row when viewing your list of all Quick Invoices.
Q: Can I re-send a Quick Invoice?
A: Yes, Quick Invoices can be re-sent by clicking on the orange Re-Send button in the upper right corner when viewing the invoice.
Q: Where can I find all of my Quick Invoices?
A: To view Quick Invoices under all of your locations, click on Quick Invoices directly from the menu on the left. To view all Quick Invoices under a specific location, first navigate to the location, then click on the Quick Invoices tab at the top of the page.
Q: Where can I find a Quick Invoice for a specific cardholder?
A: Quick Invoices that are associated with a contact can be found under the contact’s profile.
- Click on Contacts from the menu on the left.
- Locate the contact and click on their name to pull up their profile Overview page.
- Click on the Quick Invoices tab toward the top of the page.
Q: How can I edit a Quick Invoice?
A: When viewing your list of all Quick Invoices, you can edit them by clicking the blue View button on the right side of each row.
Q: Can I change the amount on the invoice?
A: If the invoice is open and unpaid, the amount owed can be changed by editing the Quick Invoice.
Under the Item List section, click the red delete button to delete the item, then add a new item