Setting Up Quick Invoicing
Quick Invoice must be activated for your account before you can use that feature. If you do not see the options shown for Quick Invoice, please contact Support.
Navigate to Quick Invoice Settings
- Click the Locations option in the left-hand menu.
- Click the Location Name where you want to set up Quick Invoicing.
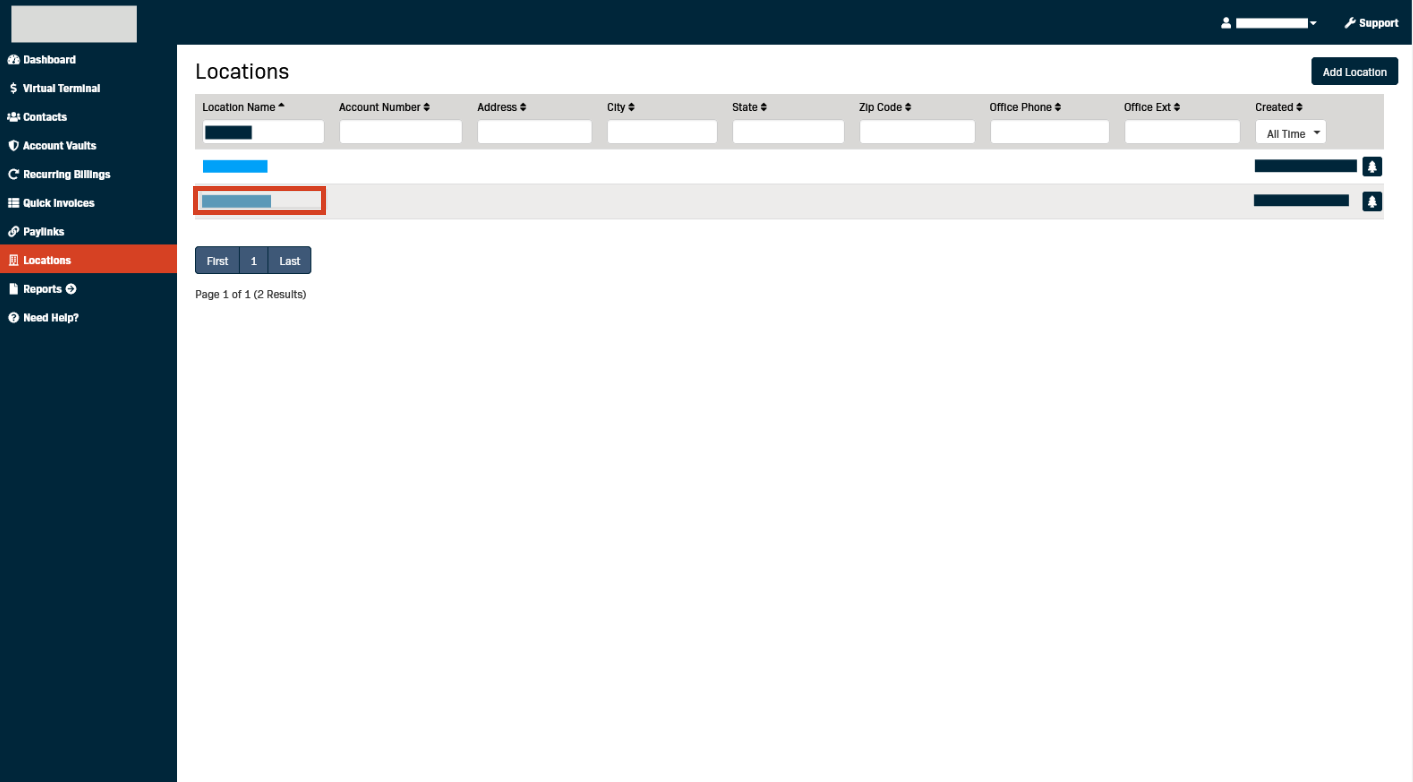
- Click Settings.
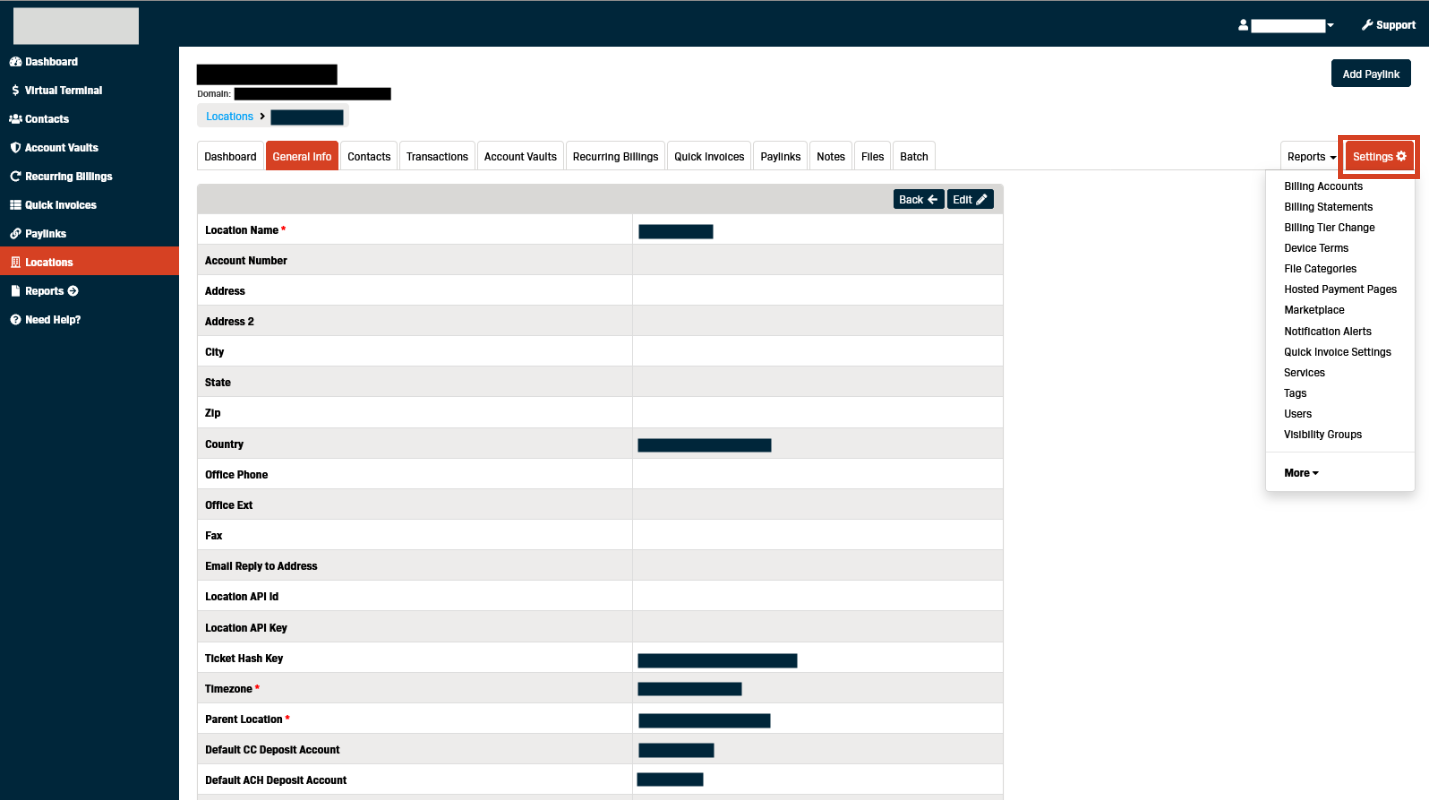
- Click Quick Invoice Settings.
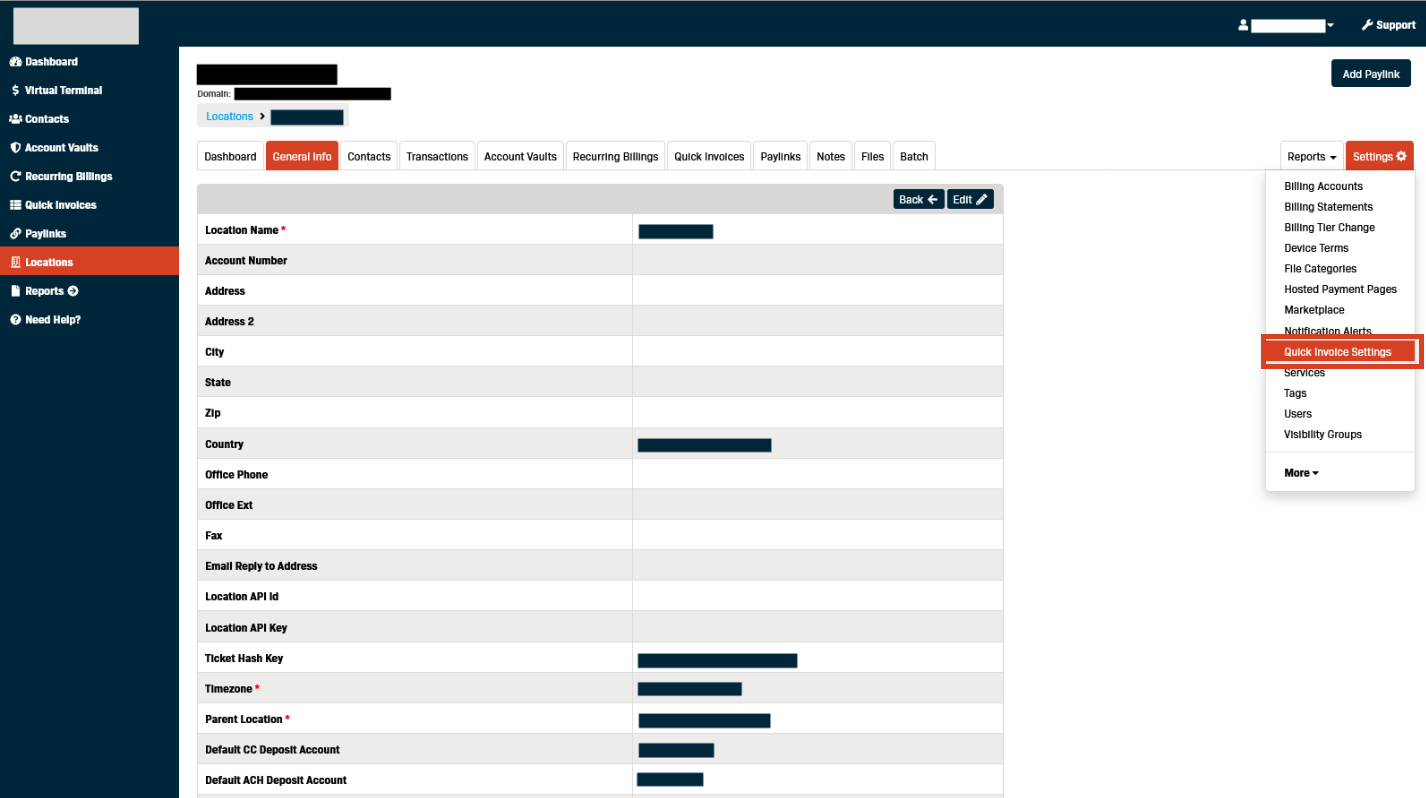
- Click Edit.
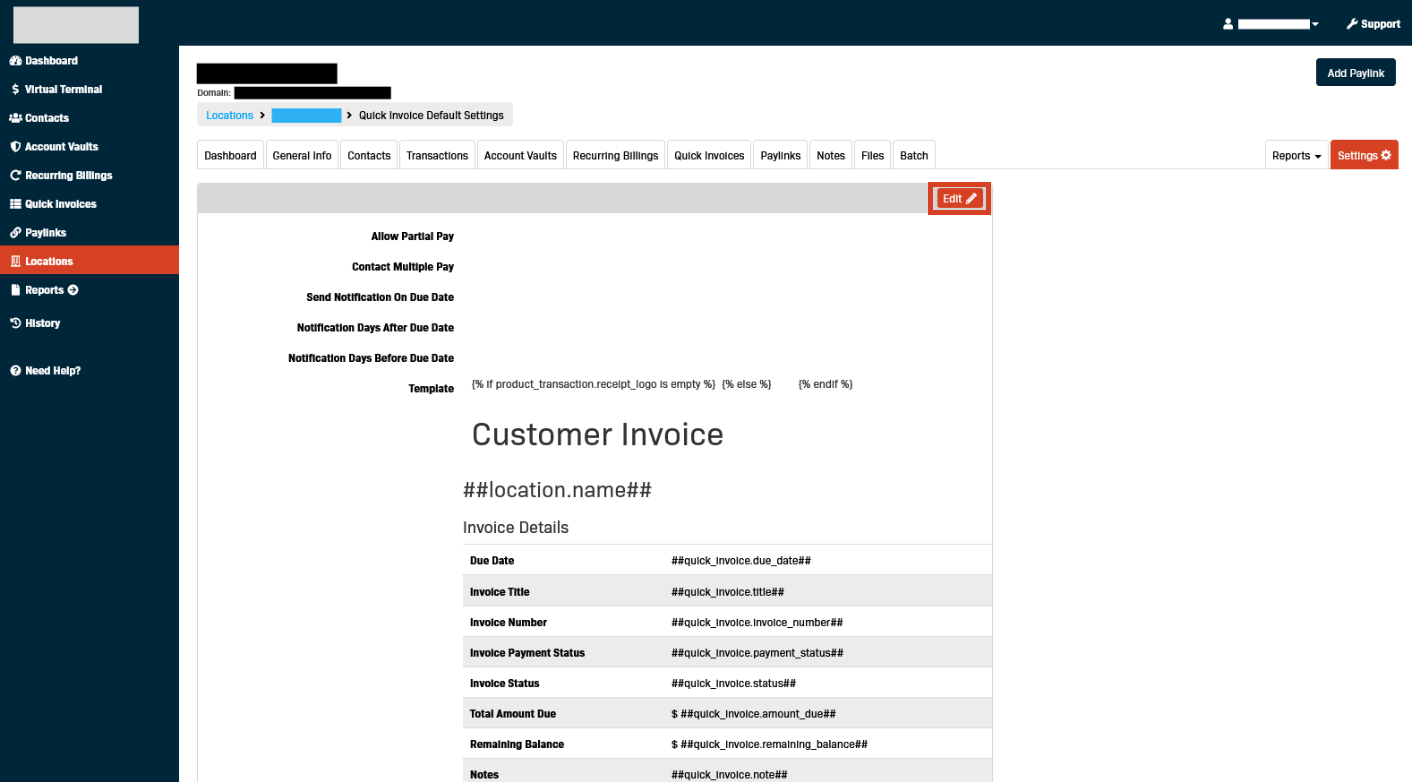
- Select 'Yes' from the Allow Partial Pay drop-down menu to let Contacts make partial payments against unpaid quick invoice balances.
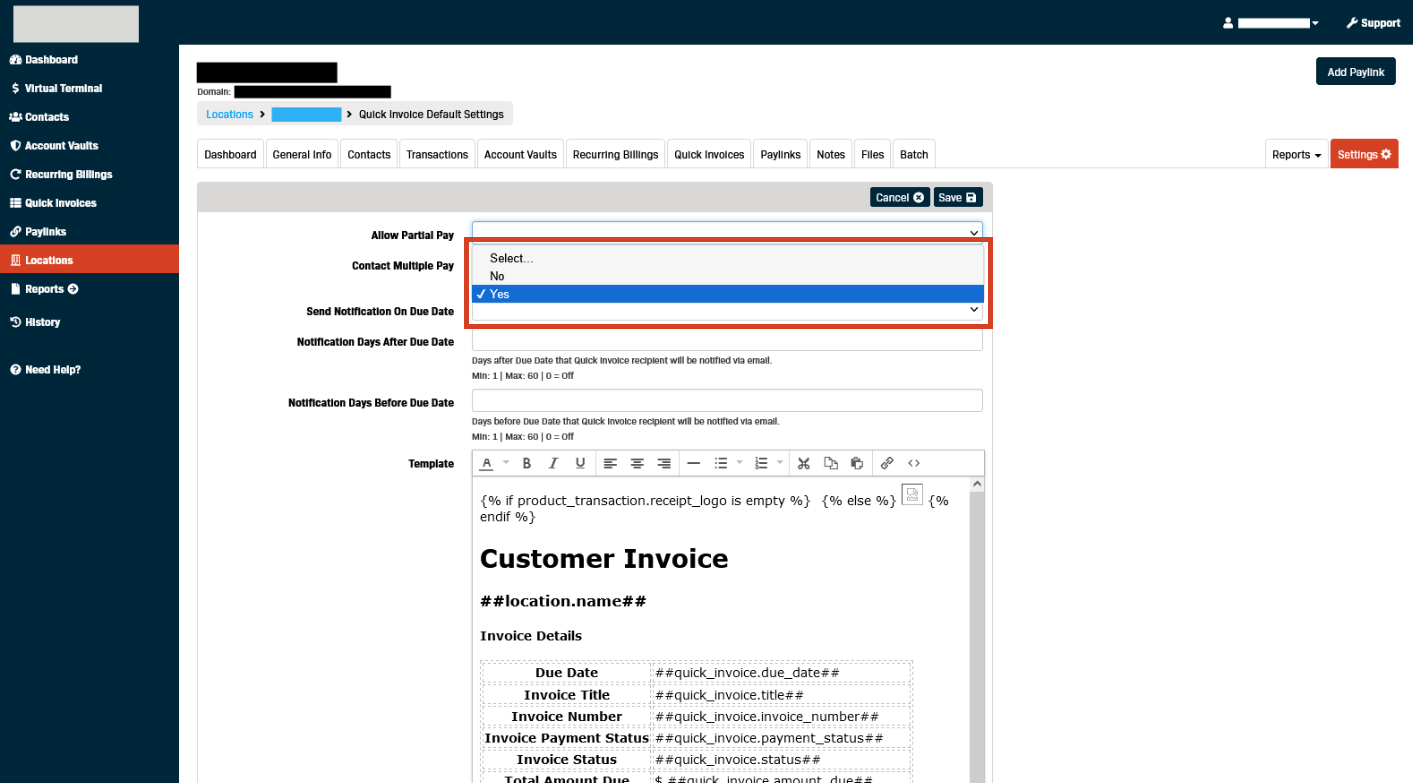
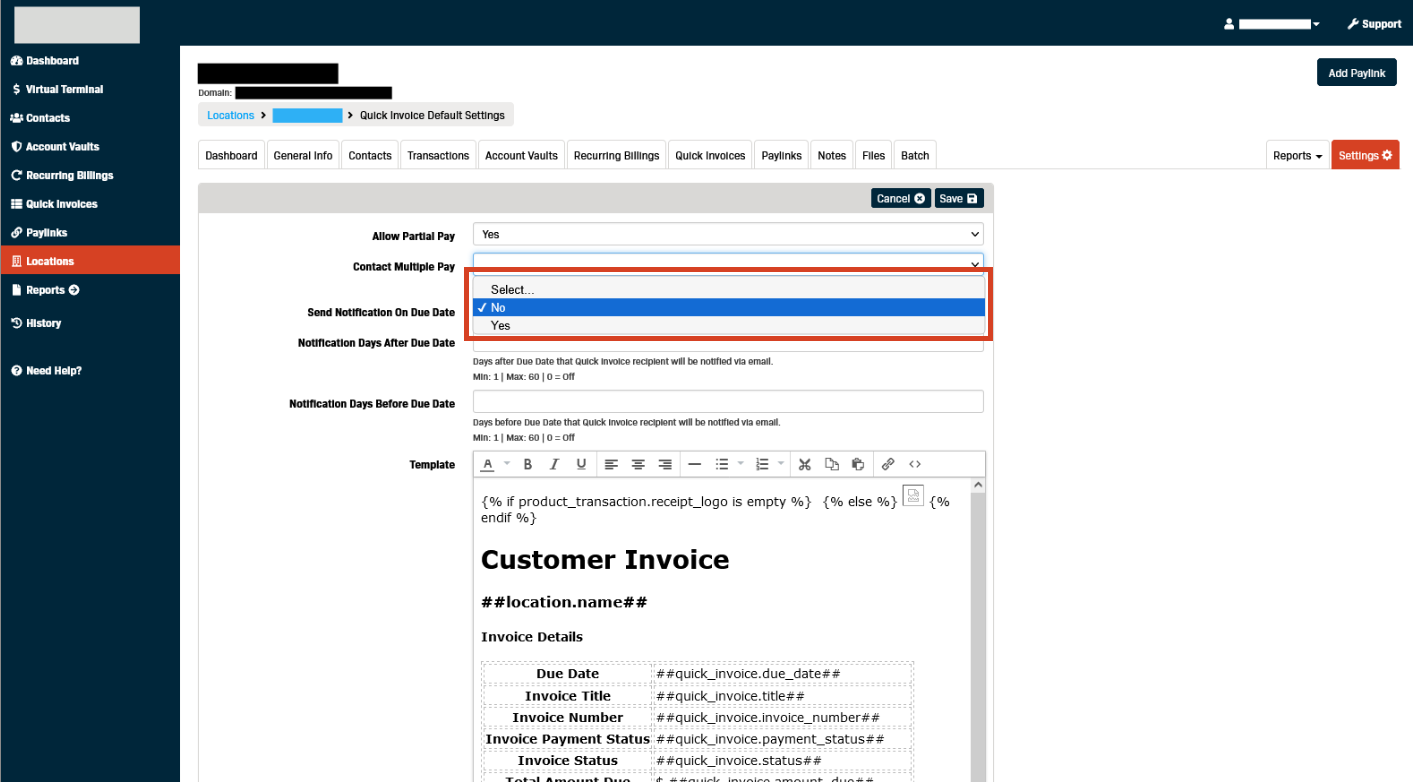
- Select 'Yes' from the Contact Multiple Pay drop-down to allow Contacts to:
- See all the unpaid Quick Invoices they have open
- Have the ability to pay all their unpaid Quick Invoices together
- Select 'Yes' from the Send Notification On Due Datedrop-down menu to have the system auto-email the Contact on the Quick Invoice's due date.
(Note) The due date is set as part of creating a Quick Invoice.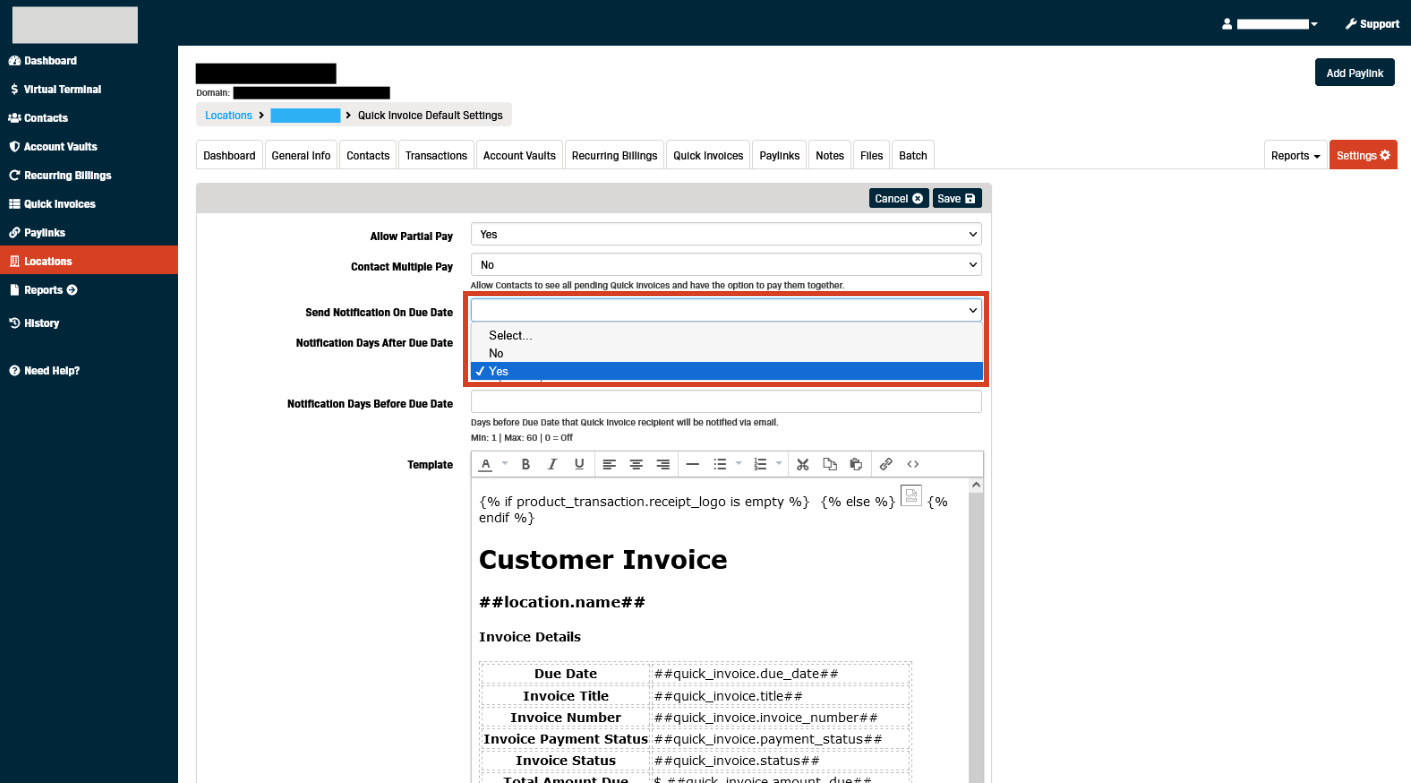
Use the Notification Days After Due Date field to send an automatic reminder email to the Contact if their Quick Invoice isn't paid by the Due Date.
(Note) The number of days can be from 1 to a maximum of 60. Enter zero (0) to turn off this feature.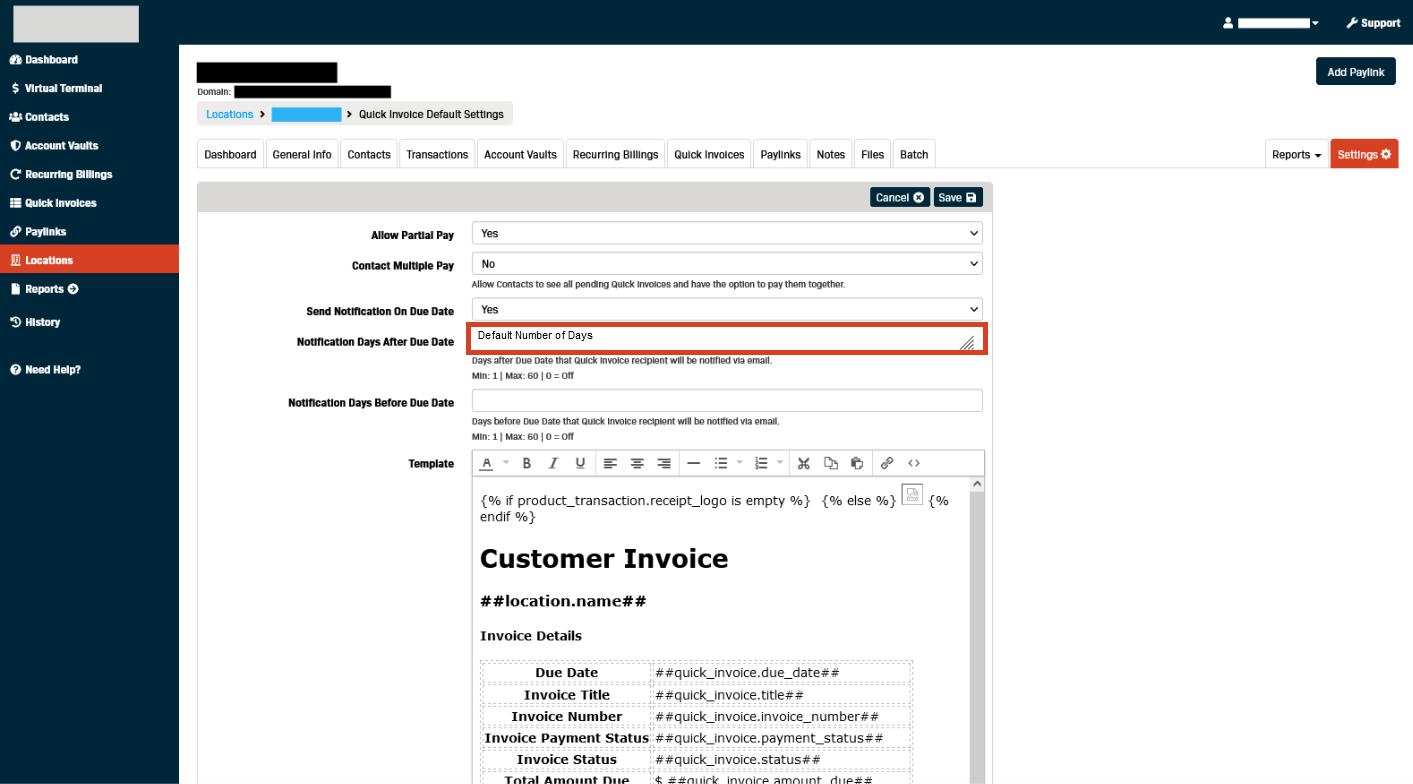
Use the Notification Days Before Due Date field to send an automatic reminder email to the Contact before their Quick Invoice is due.
(Note) The number of days can be from 1 to a maximum of 60. Enter zero (0) to turn off this feature.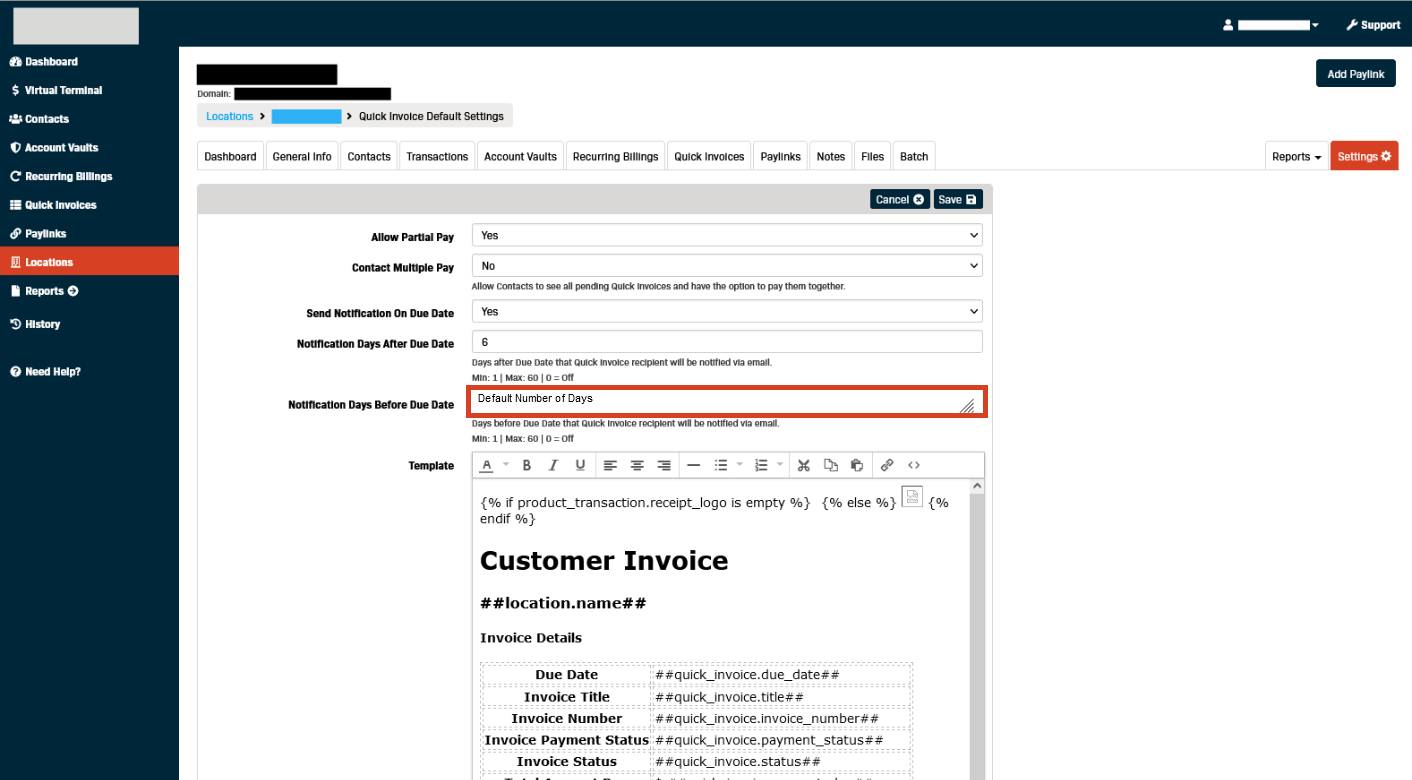
Use the Template section to customize the Quick Invoice layouts for the location.
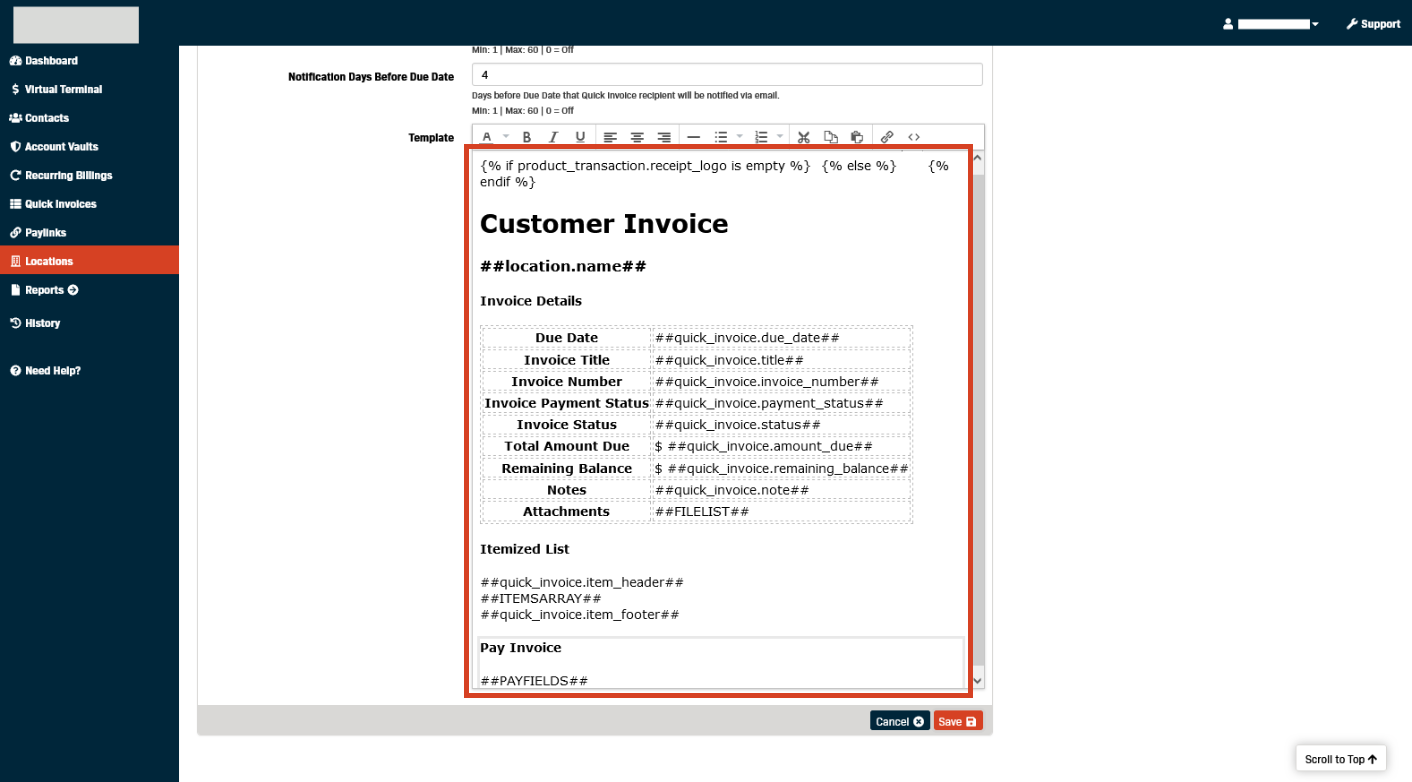
Click Save to complete the Quick Invoice setup.