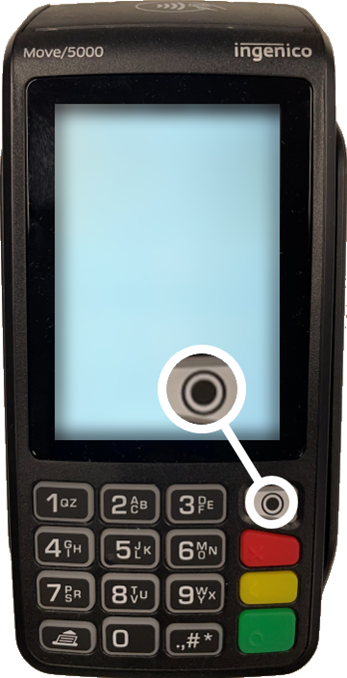
This article gives step-by-step instructions for configuring the Wi-Fi connection on the Move/5000 wireless payment terminals.
Configure the Wi-Fi Connection on an Ingenico Move/5000
The Move/5000 has a touchscreen so any selections can be made directly on the screen.
- Enter 0-0-0-1 using the keypad to access the terminal’s Admin Menu.
- NOTE: A menu will display showing your Wi-Fi connection and battery status. The Wi-Fi indicator will be white, indicating the Move/5000 payment terminal is not connected to Wi-Fi.
- Press the Circle (Function) key to open the main menu.
- Tap on Tetra Admin to open the menu.
- Tap on Option 4: Configure Wi-Fi to open the menu.
- Tap on Tetra Admin to open the menu.
- Tap on Option 2: Scan Networks to open the menu.
- Tap on the name of your wireless network.
- Enter your network password.
- NOTE: Password entry defaults to CAPS. At the bottom of the screen are the options to select Upper-Case, Lower-Case, Numbers, and Special Characters.
- Press the Green (Enter) Key when the password has been keyed in.
- Press the Green (Enter) Key when the connection confirmation screen appears.
- Password Accepted – The Wi-Fi icon will turn green.
- Password Denied – The Wi-Fi icon will remain white.
- Press the Red (Exit) Key to return through the menus to the home screen.
- Cycle the power to reboot the terminal.
Figure 1: Ingenico Move/5000 Terminal
